How to Make a Looping Animation, Part 2
Part 2, make an Infinite Paging Scroll to slide pages repeatedly in two opposite directions.


Hello everyone! ProtoPie teacher Leah here with the second part of Looping Animations.
Last week, we covered basic Looping Animations; this time, we will teach you how to make an Infinite Paging Scroll. But first…
What is an Infinite Paging Scroll?
An Infinite Paging Scroll is when you can slide pages repeatedly in two opposite directions, like the demo below.

What’s the logic behind it?
In this case, I used 3 pages and grouped them using paging containers.
This is a very basic feature in ProtoPie. If you haven’t tried to make a paging container yet, this Scroll & Paging tutorial will be helpful for you.
I assume you already know how to make it, so let’s jump to the next step.
1. When you slide the 3rd page to the left, there should be a page following behind it. So we need to duplicate Page 1 as Page 1' and put it after Page 3.

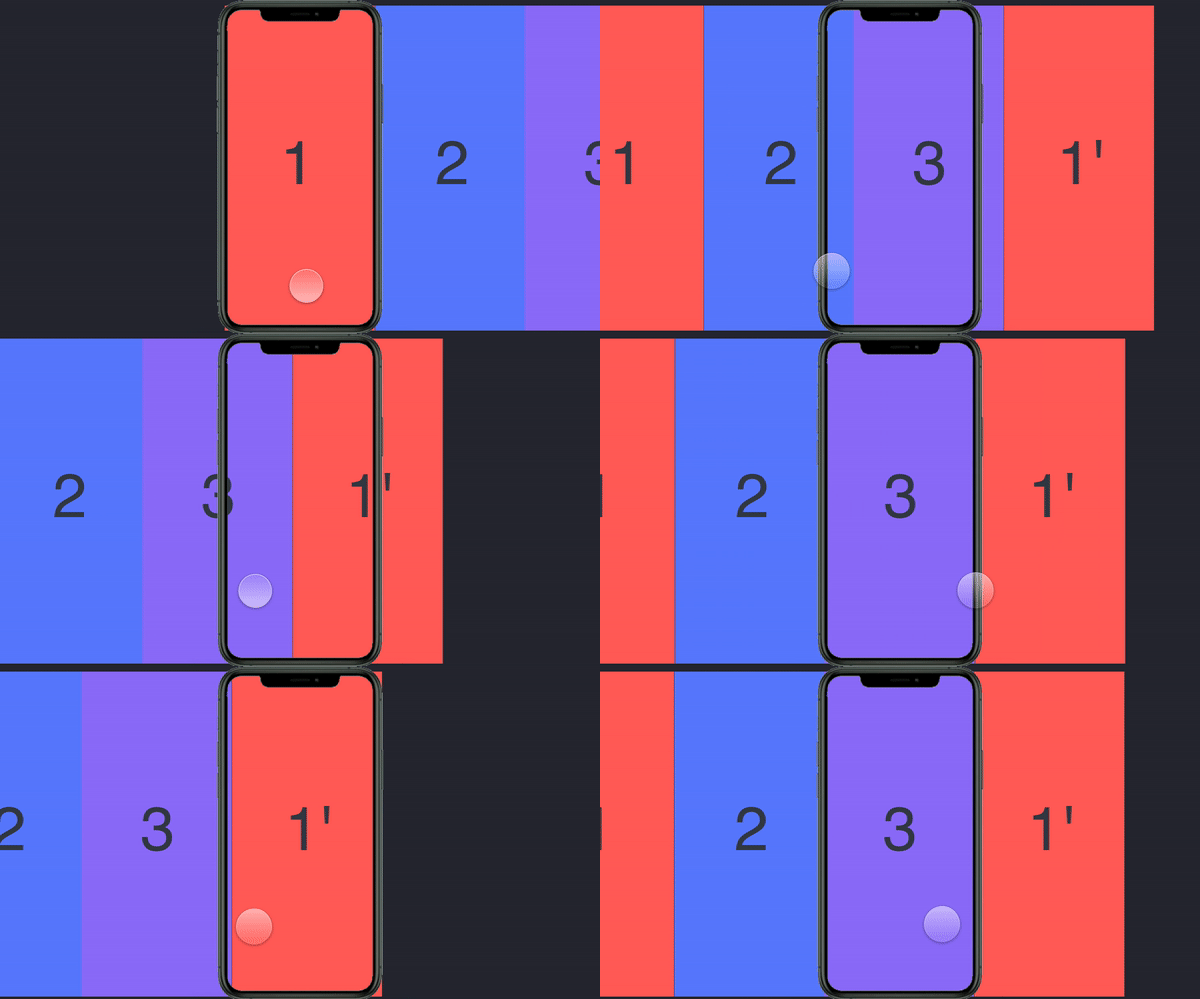
2. When Page 1' scrolls to the center of the screen, at that moment, all 4 pages should scroll back to the original position so Page 1 is on the screen again. Visually, users won’t be able to recognize the existence of the 4th page (Page 1') if we scroll them back immediately (during=0), because it is exactly the same as Page 1.

3. Now let’s learn how to scroll pages from right to left. First, same as before, there should be a page on the left side of the 1st Page, so I duplicated page 3 as page 3' and put it on the left side of Page 1. Then let those five pages start scrolling from Page 1. Check how to start paging from the middle page, if you don’t know how to do it.

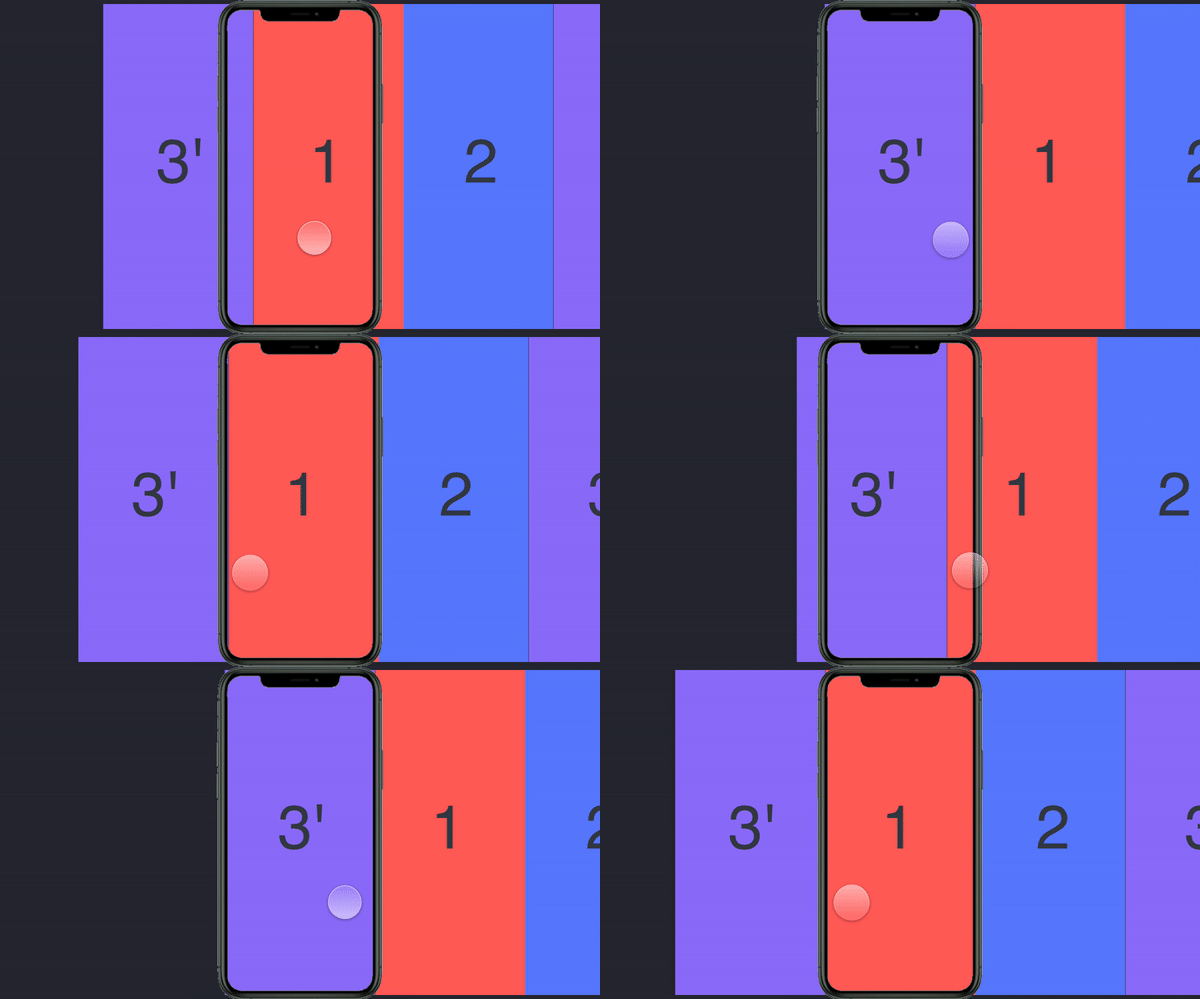
4. Same as before, when page 3' moves to the center of the screen, we need to scroll the pages back to Page 3 immediately, so we can continue to slide from right to left.

How to make this interaction with ProtoPie?
To make it happen, we need to use the ‘Range’ trigger and ‘Scroll’ response.
1. When Page 1' scroll to the center of the screen, the distance (scroll offset) is 750. With the ‘Range’ trigger, we can set scroll offset is between 749.5 ~ 750.5, then scroll page to 187.5 using ‘Scroll’ response(= the width of each page).


2. When Page 3' scroll to the center of the screen, the distance (scroll offset) is 0. With the ‘Range’ trigger, we can set scroll offset is between -1~ 1, then scroll page to 562.5 using ‘Scroll’ response (=the width of each page).


Note: Why I set a range between ±0.5 but another one is ±1? Well… you can set both ± with the same number, as long as the number is not too big, then the effects are the same.
This tip is not that easy, right? You can download this Pie file to take a closer look at it.
If there are some other tips that you would like to see us talking about, feel free to let us know by replying.
