ProtoPie Connect and Unreal Engine 5 Integration
Dive into the fusion of ProtoPie Connect and Unreal Engine.

.jpg)
ProtoPie emerges as a powerful ally for game designers and developers, offering a user-friendly platform to prototype real-world scenarios effortlessly. Combined with Unreal Engine, the possibilities for crafting immersive and interactive interfaces are endless.
In this step-by-step manual, we'll explore the fusion of ProtoPie Connect and Unreal Engine, empowering you to bring your UI ideas to life with ease.
Overview
Step 1. Set up the Web Browser plugin in Unreal Engine
Step 2. Create a new User Interface widget
Step 3. Add the Web Browser to your widget
Step 4. Configure the Web Browser widget
Step 5. Create a Blueprint to display the widget
Step 6. Add the UI widget to the Blueprint
Step 7. Test your ProtoPie prototype in Unreal Engine
Step 1. Set up the Web Browser plugin in Unreal Engine
Begin by setting up the web browser plugin in Unreal Engine.
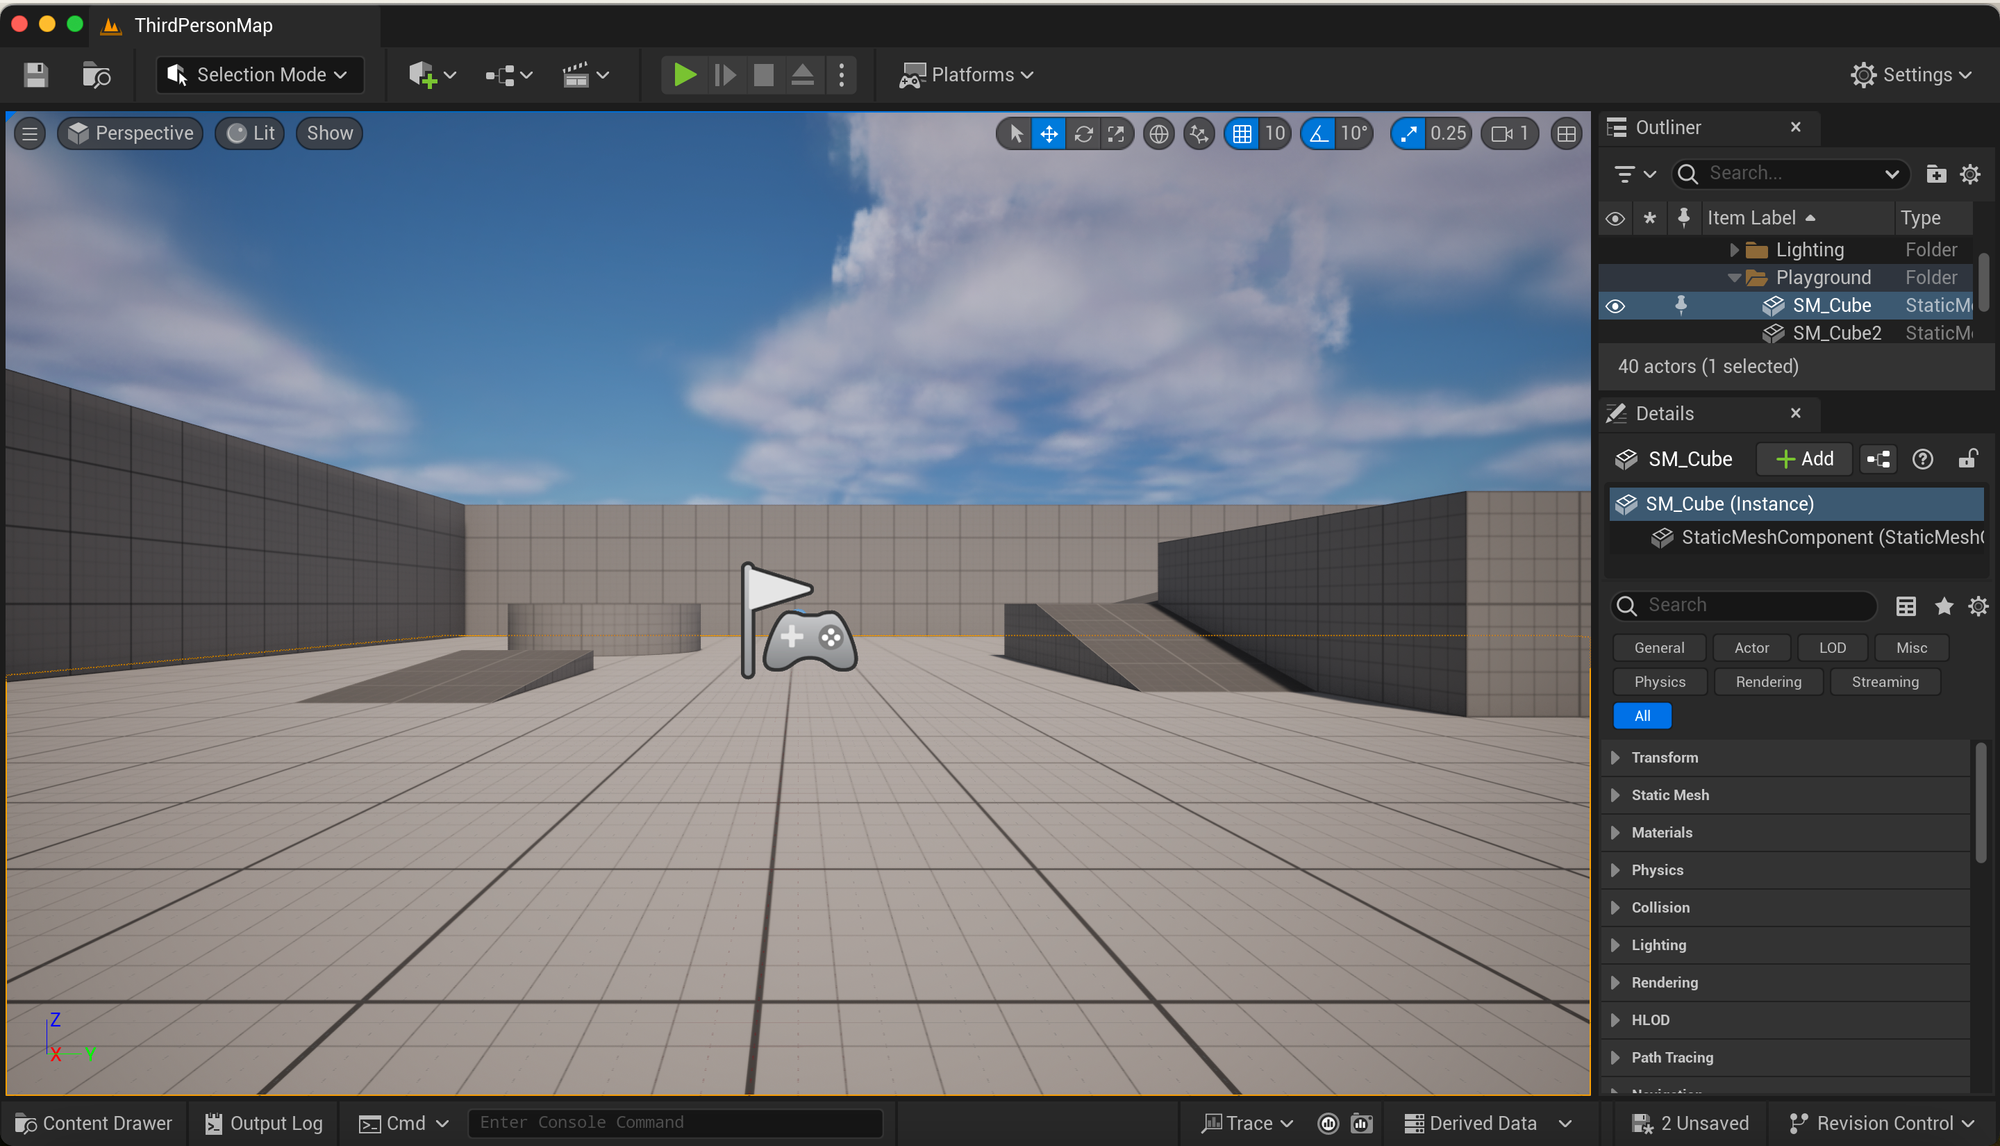
1. Open your Unreal Engine project.
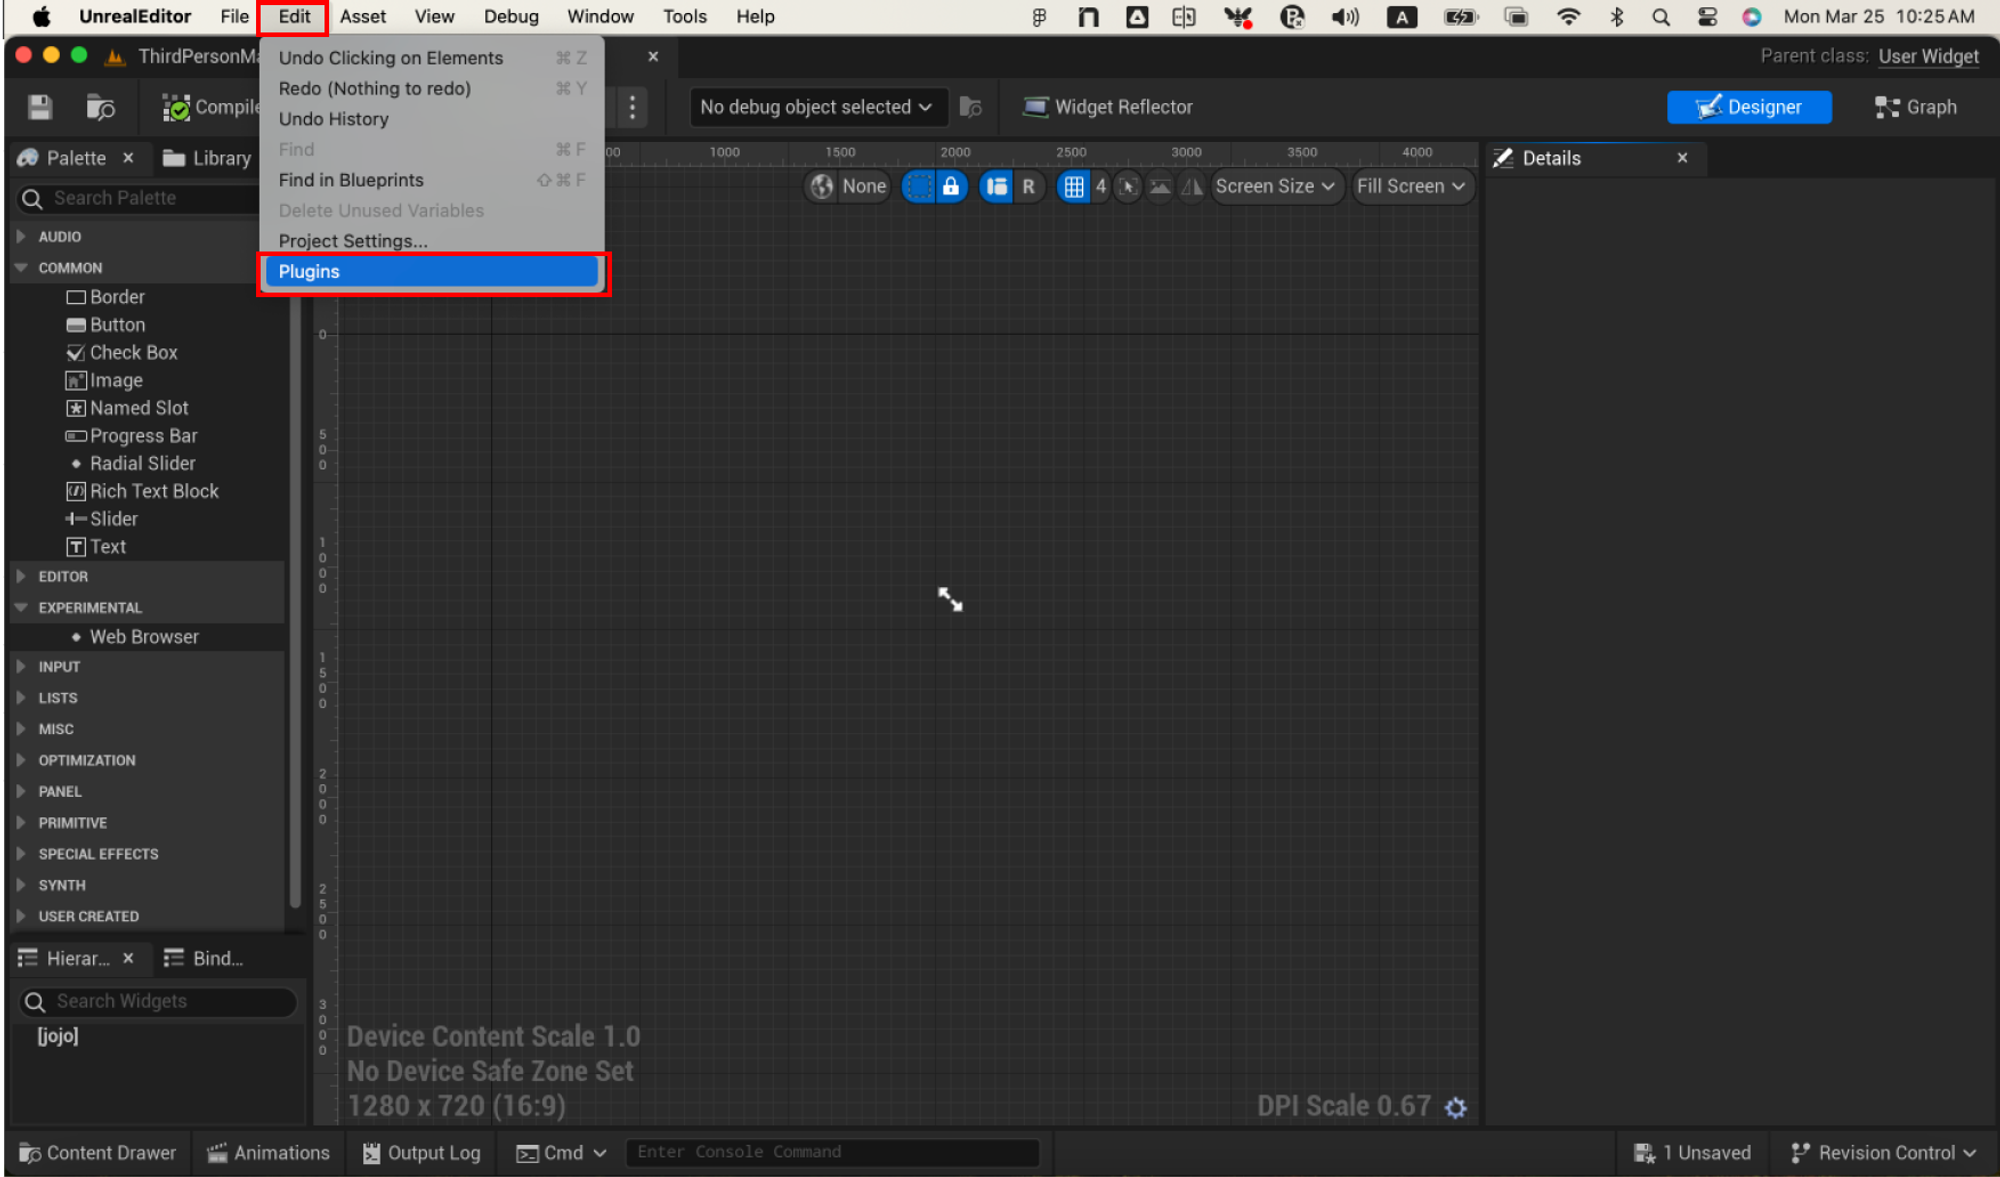
2. Go to the "Edit" menu, then select "Plugins.”
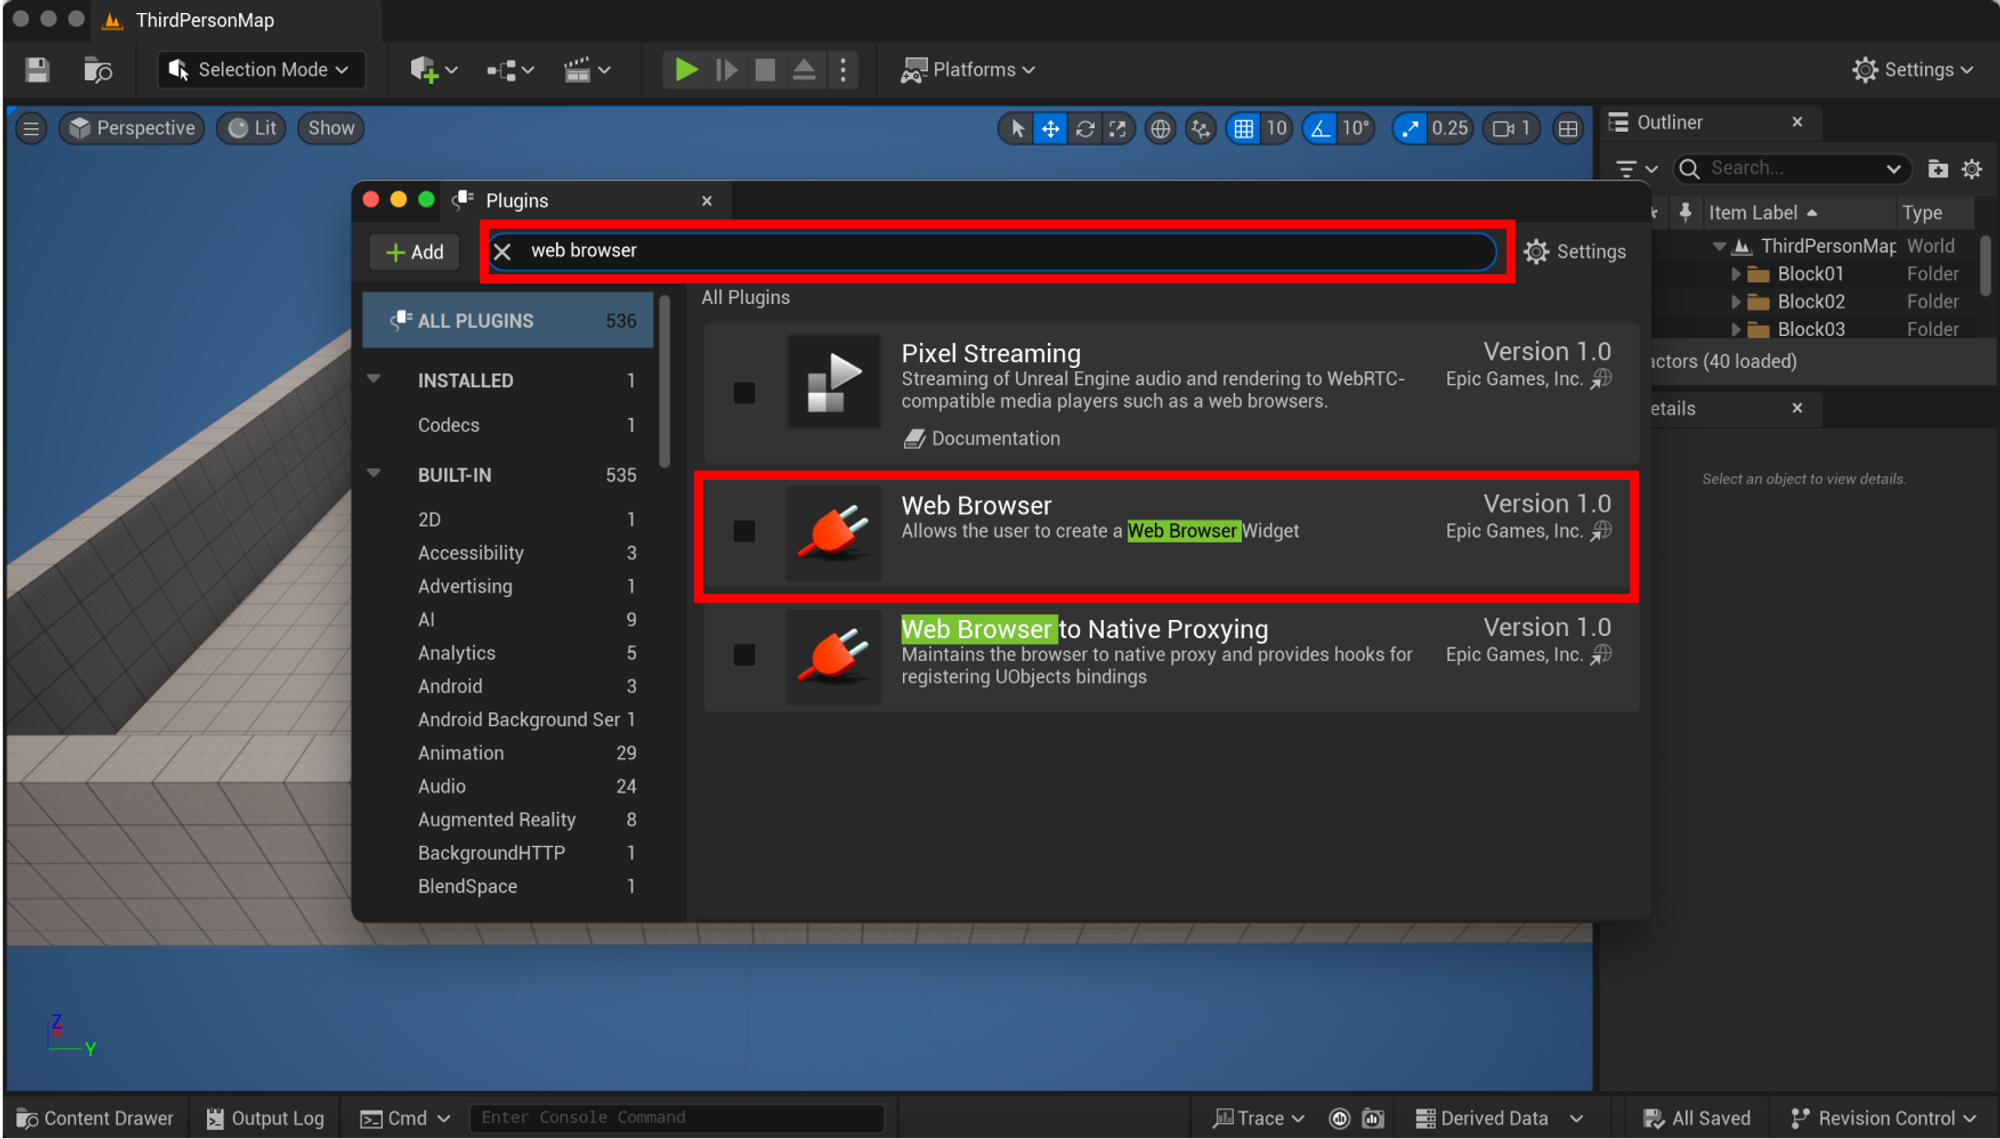
3. Search for the "Web Browser" plugin In the Plugins window.
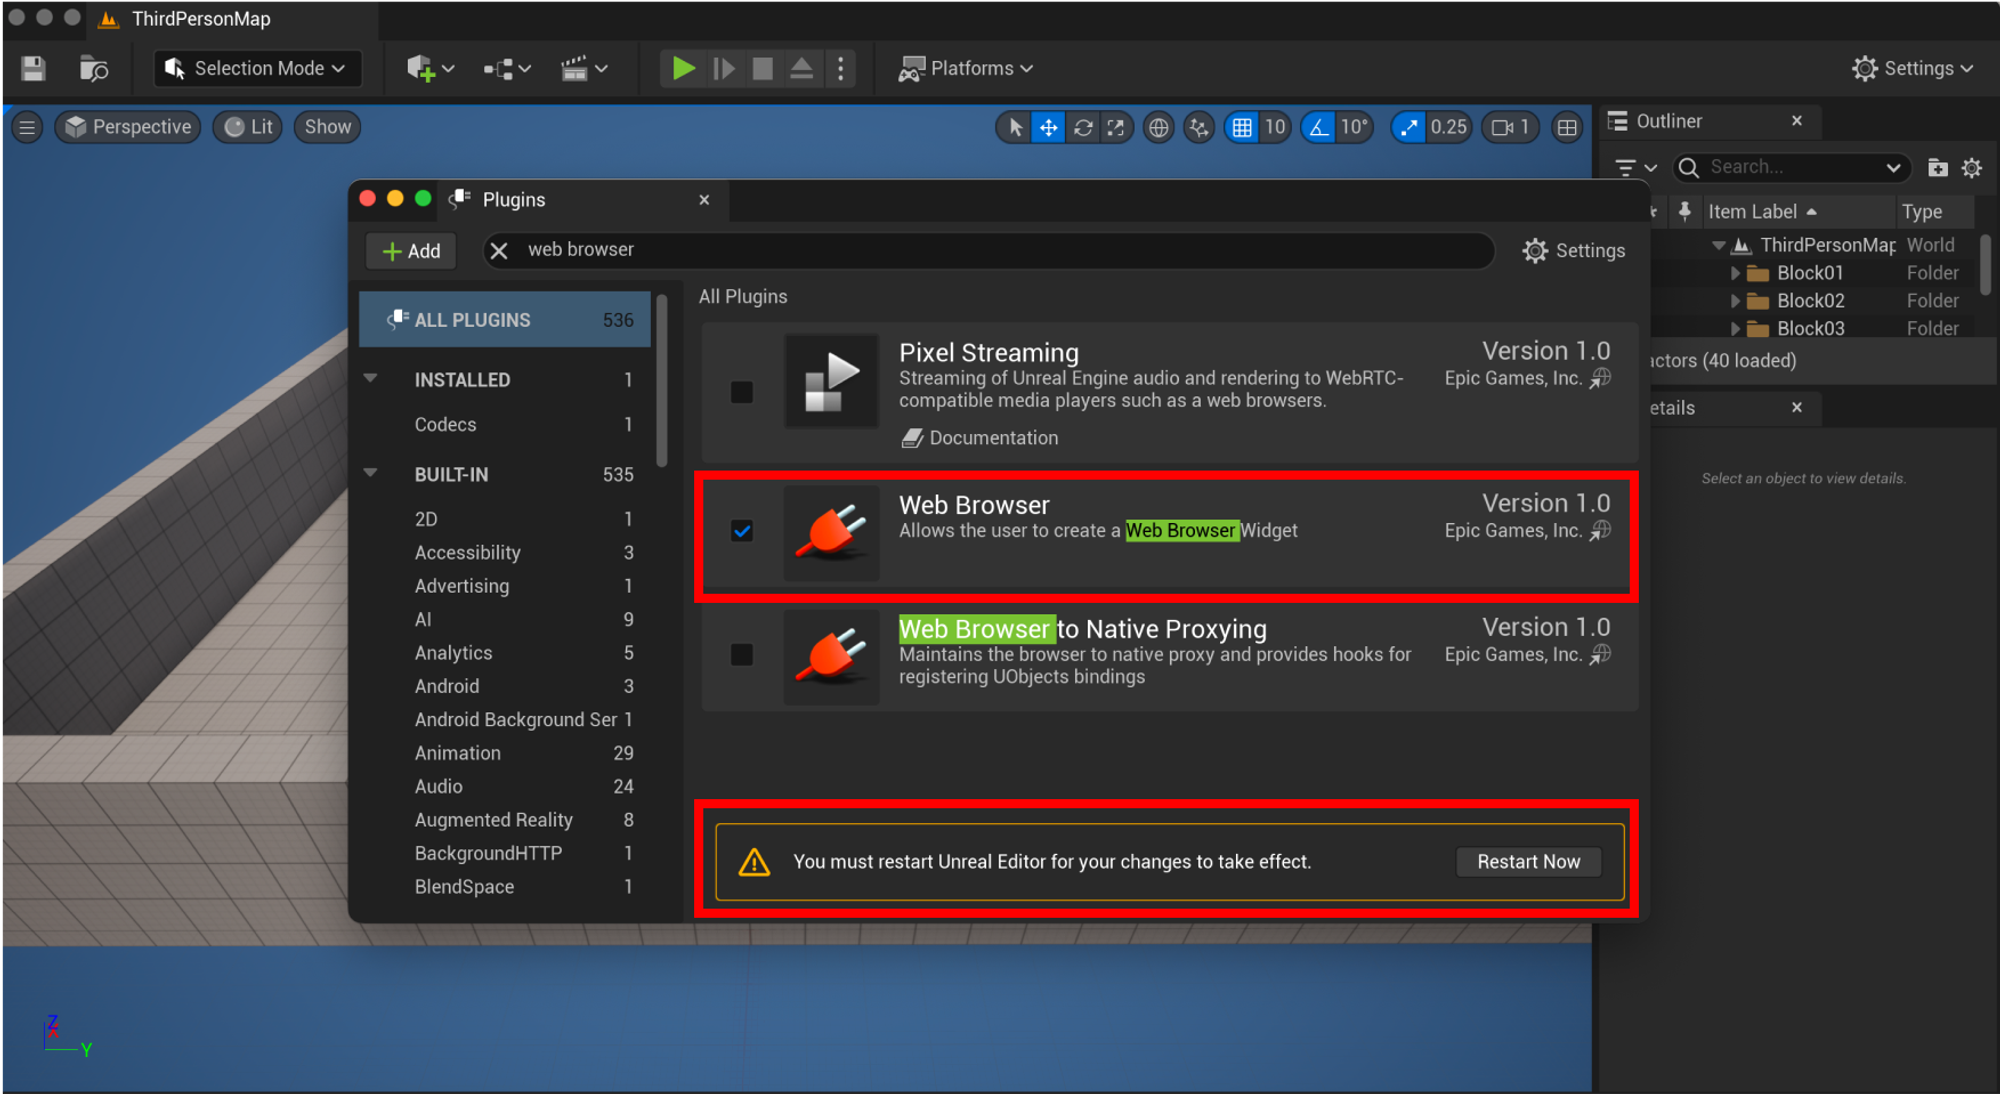
4. Enable the Web Browser plugin if it is not already enabled.
5. Restart Unreal Engine to apply the changes.
Step 2. Create a new User Interface widget
Create a new User Interface widget after setting up the web browser plugin.
1. Go to the "Content Browser" in Unreal Engine.
2. Right-click in the content area and select "User Interface," then "Widget Blueprint" to create a new widget.
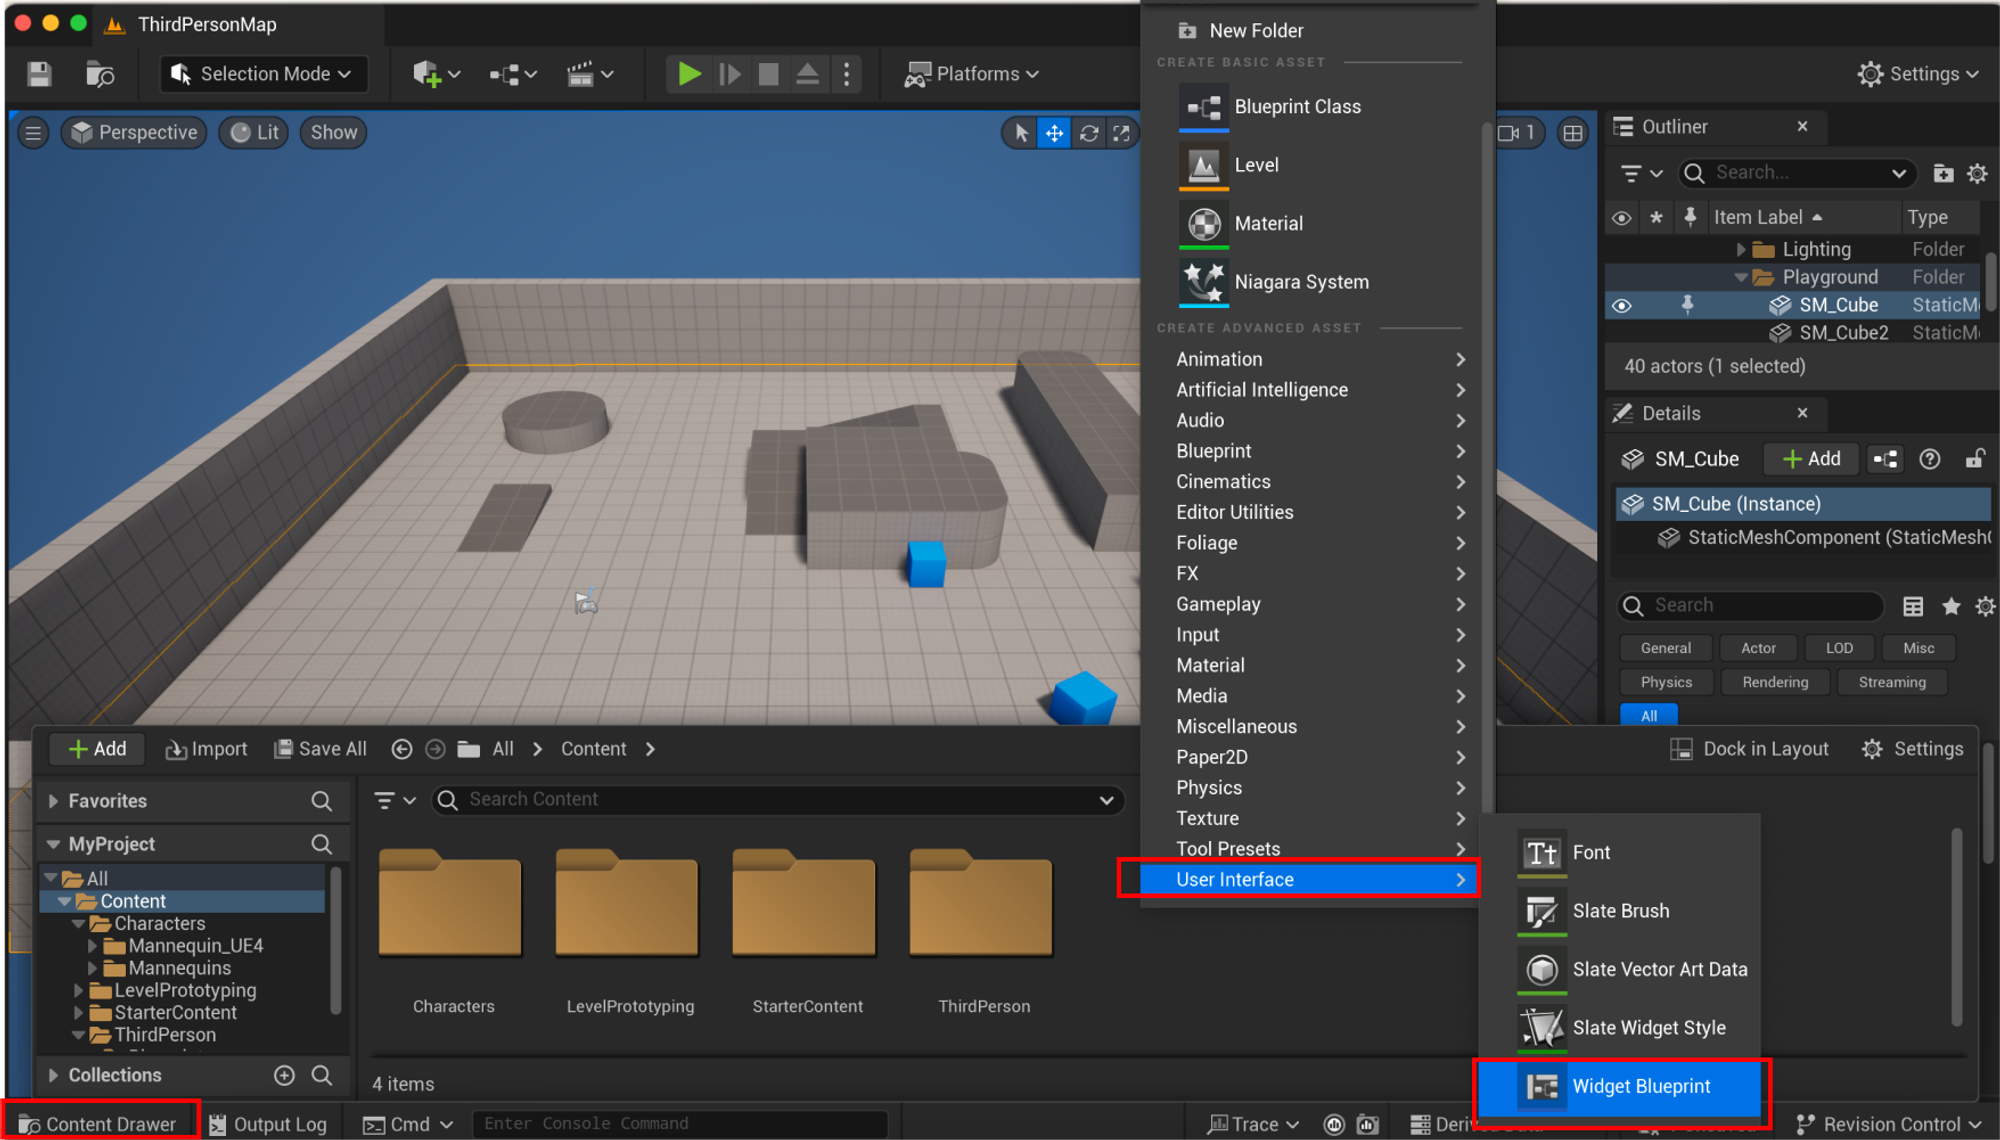
3. Select “User Widget” and name your widget appropriately.
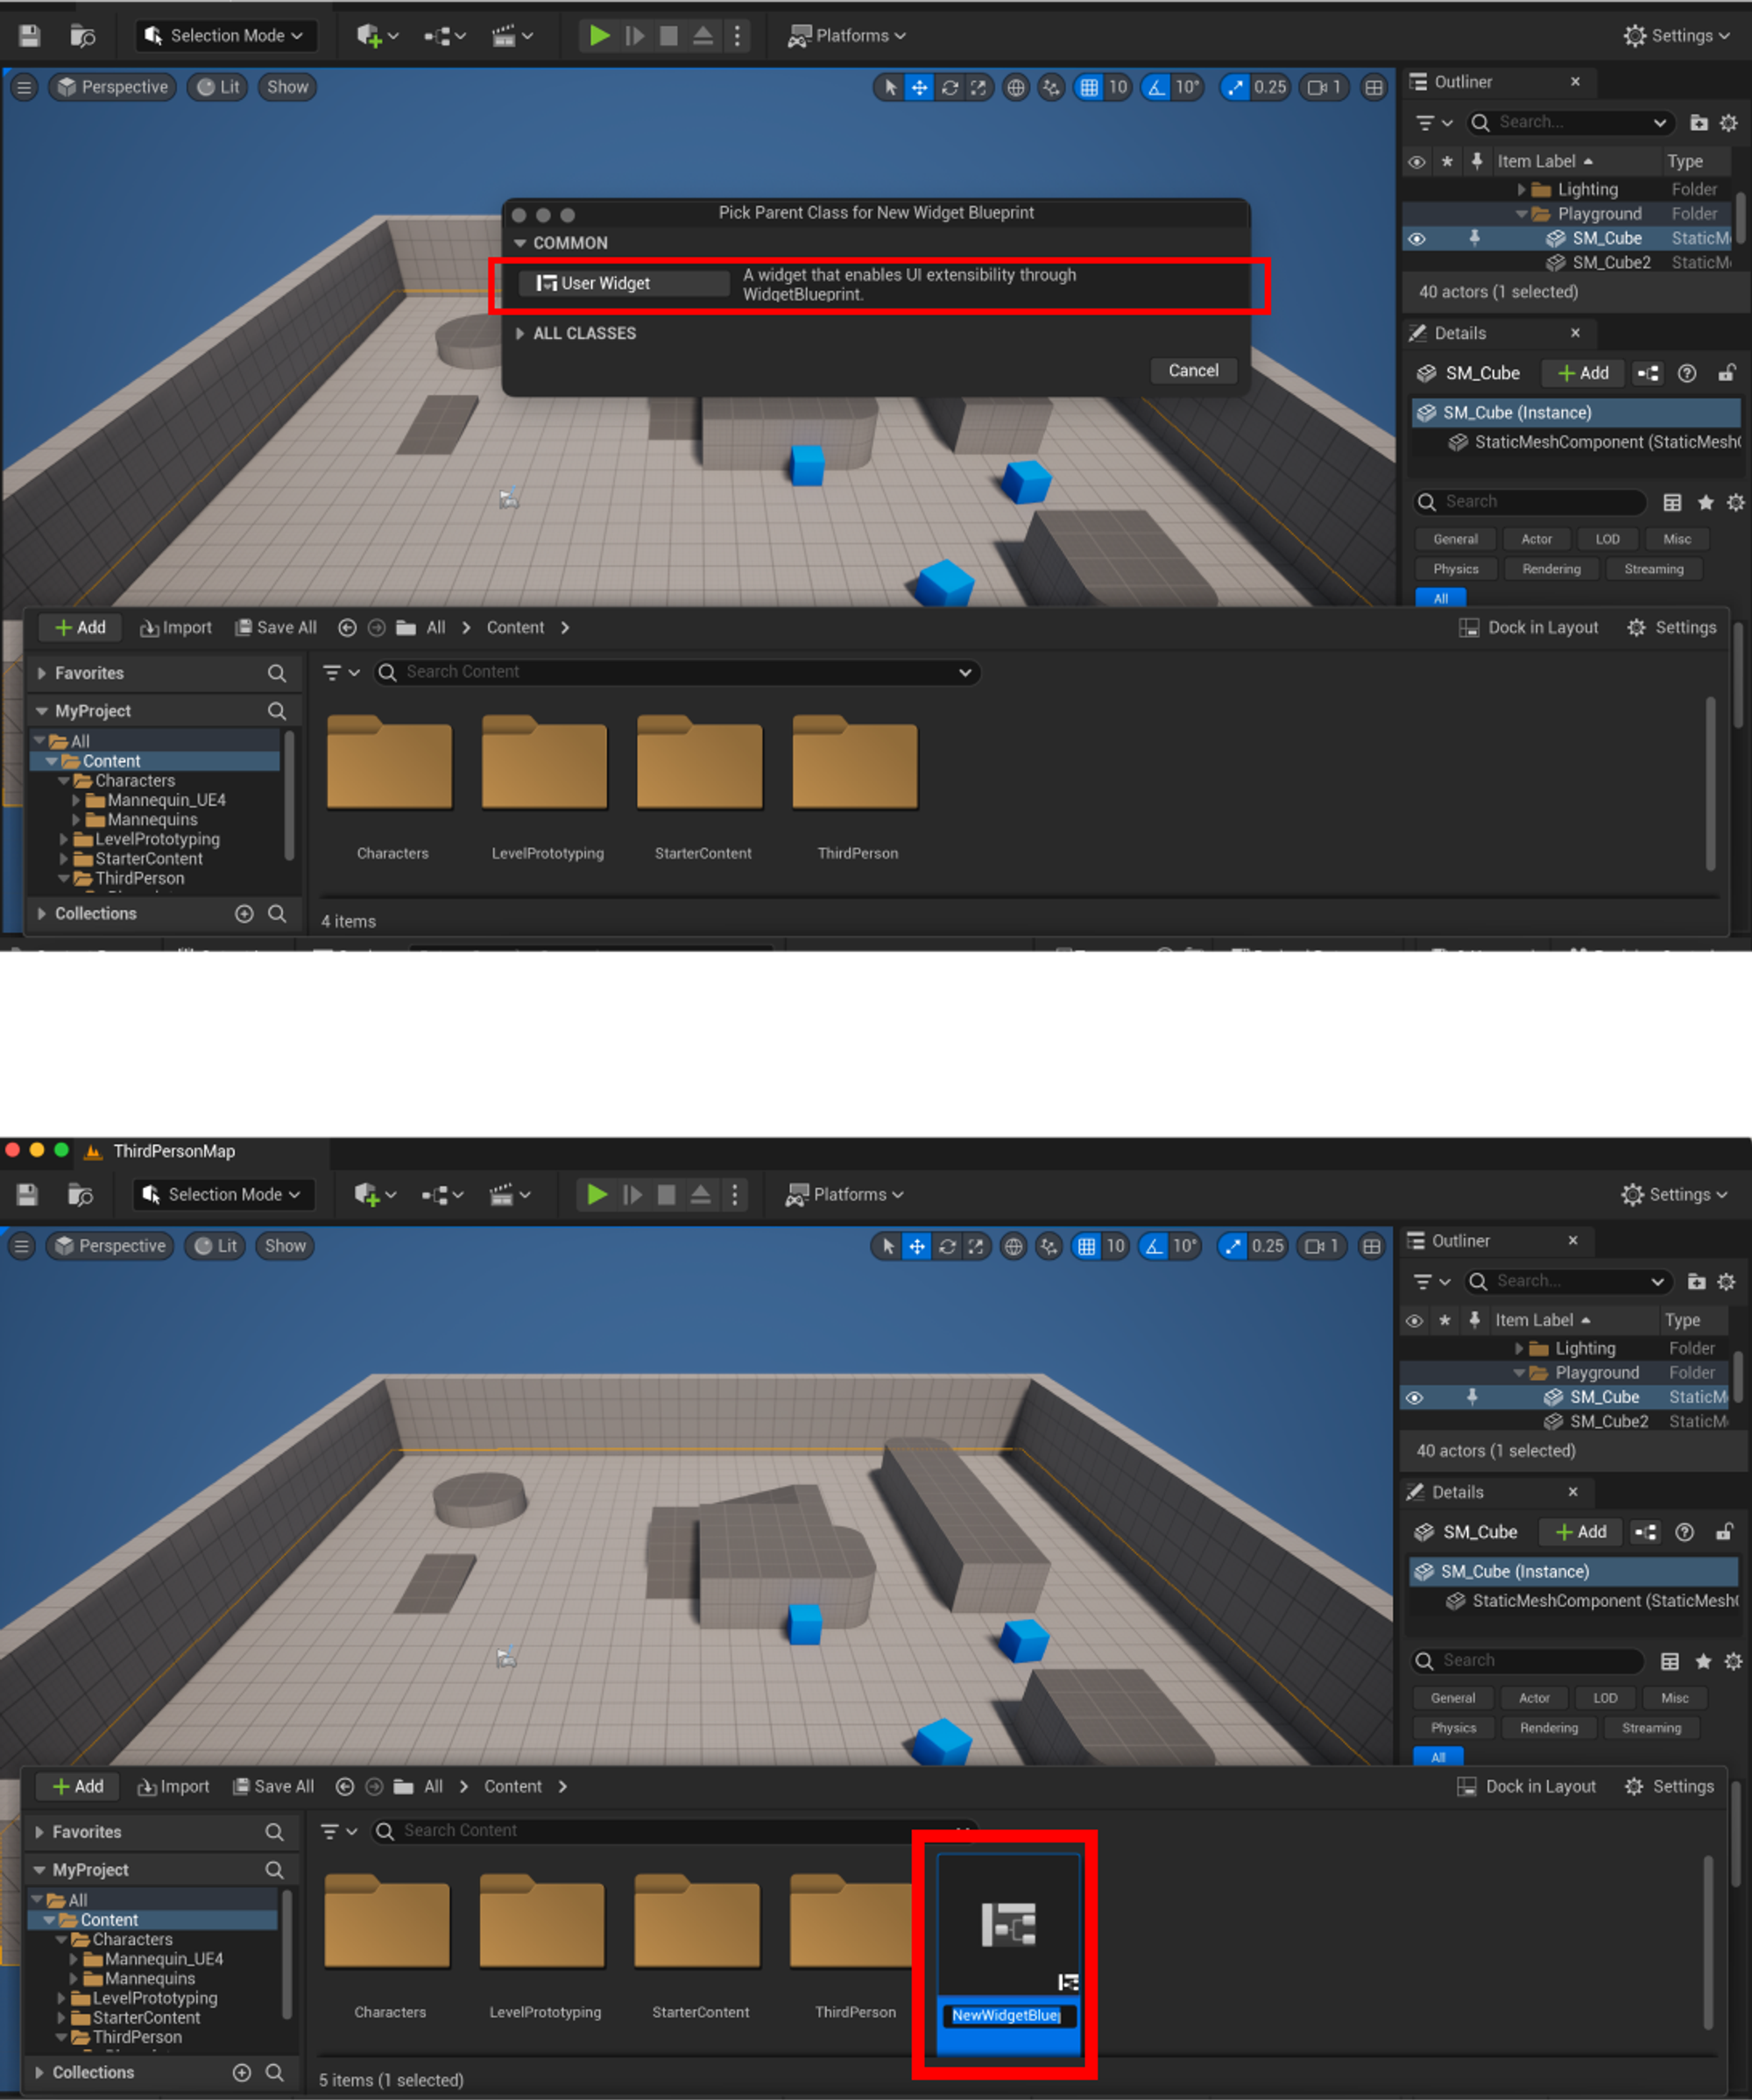
Step 3. Add the Web Browser to your widget
For the next step, you must include the web browser in your widget.
1. Open the Widget Blueprint you just created by double-clicking it.
2. A new window will open; you can click and drag this window to the main tab.

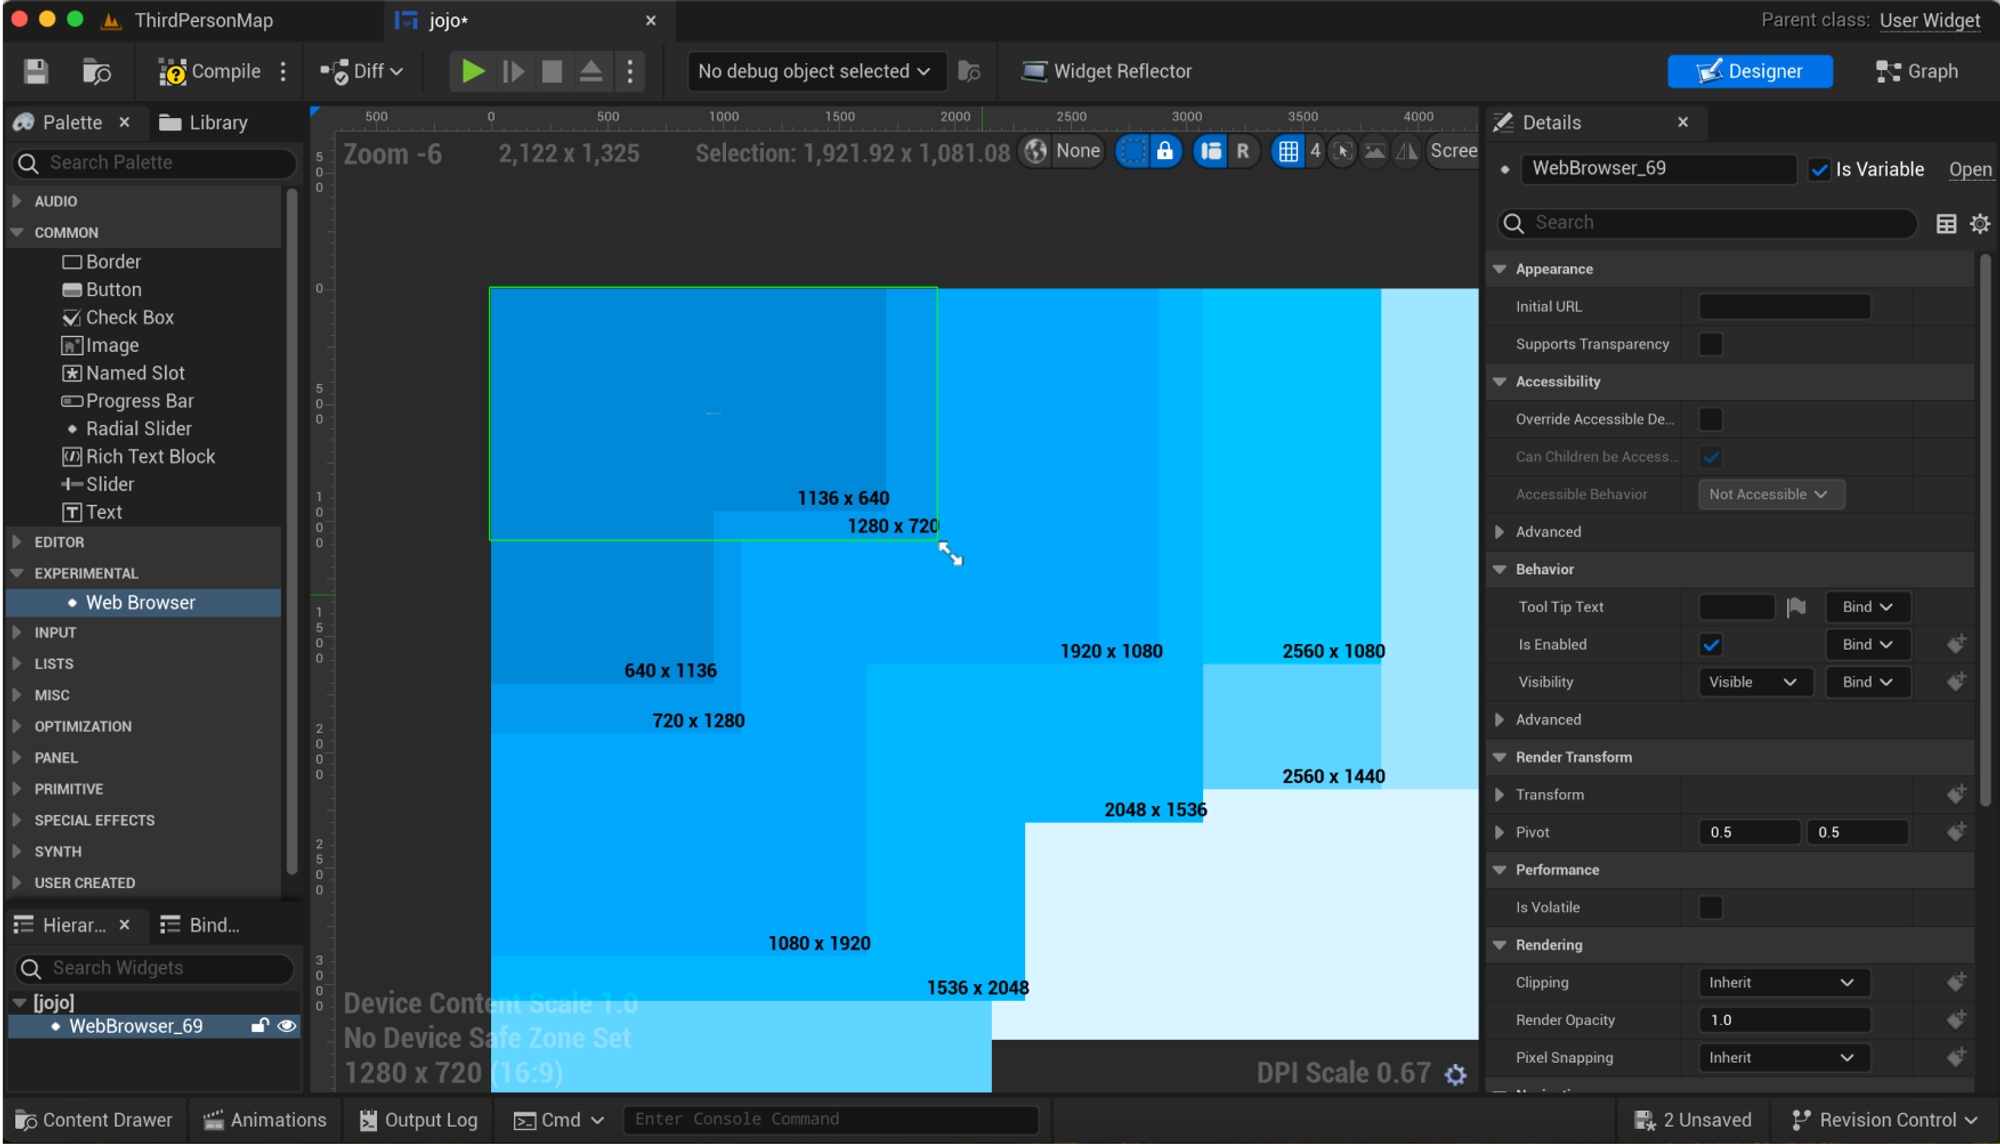
3. In the Designer tab, search for the "Web Browser" widget in the left Palette panel under “Experimental.”
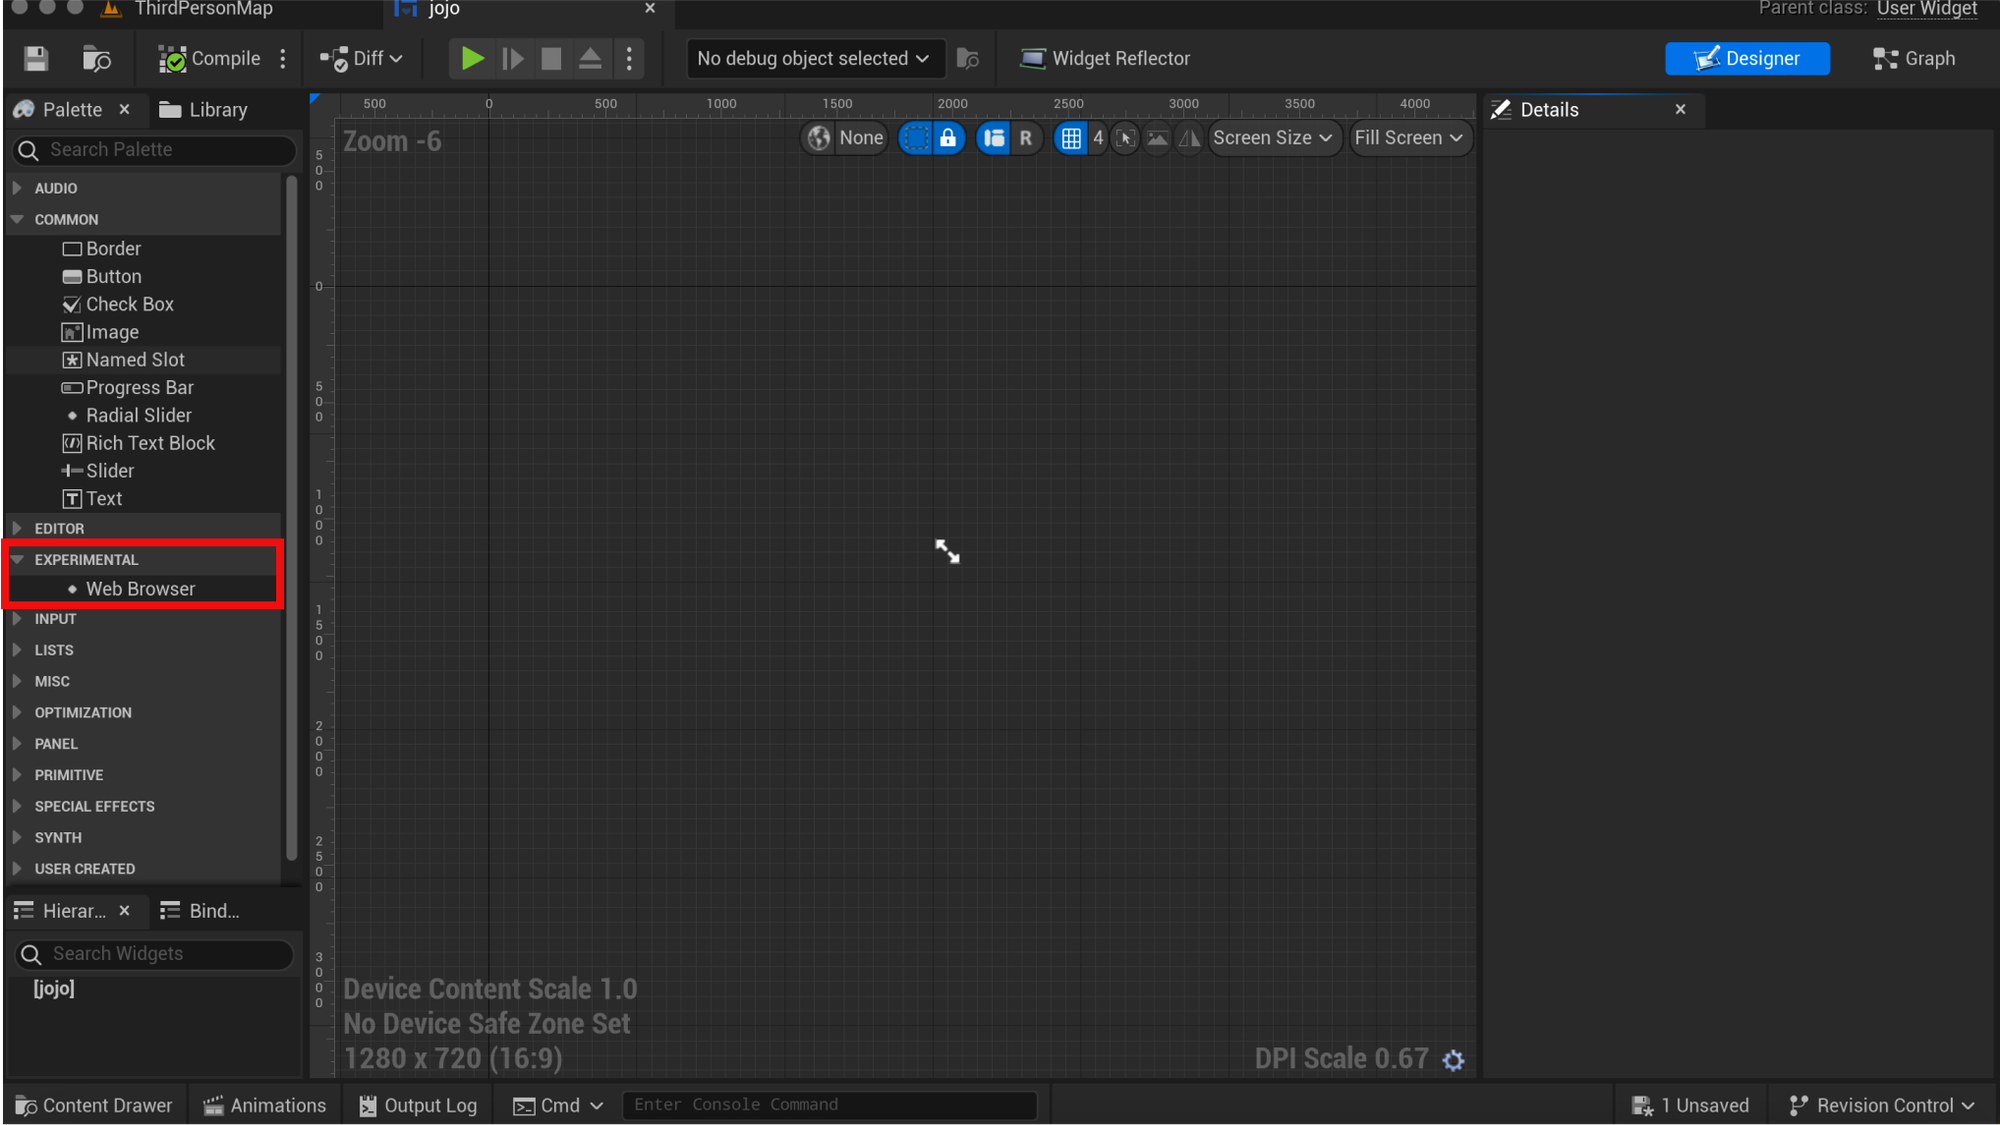
4. Drag and drop the Web Browser widget into your widget layout.
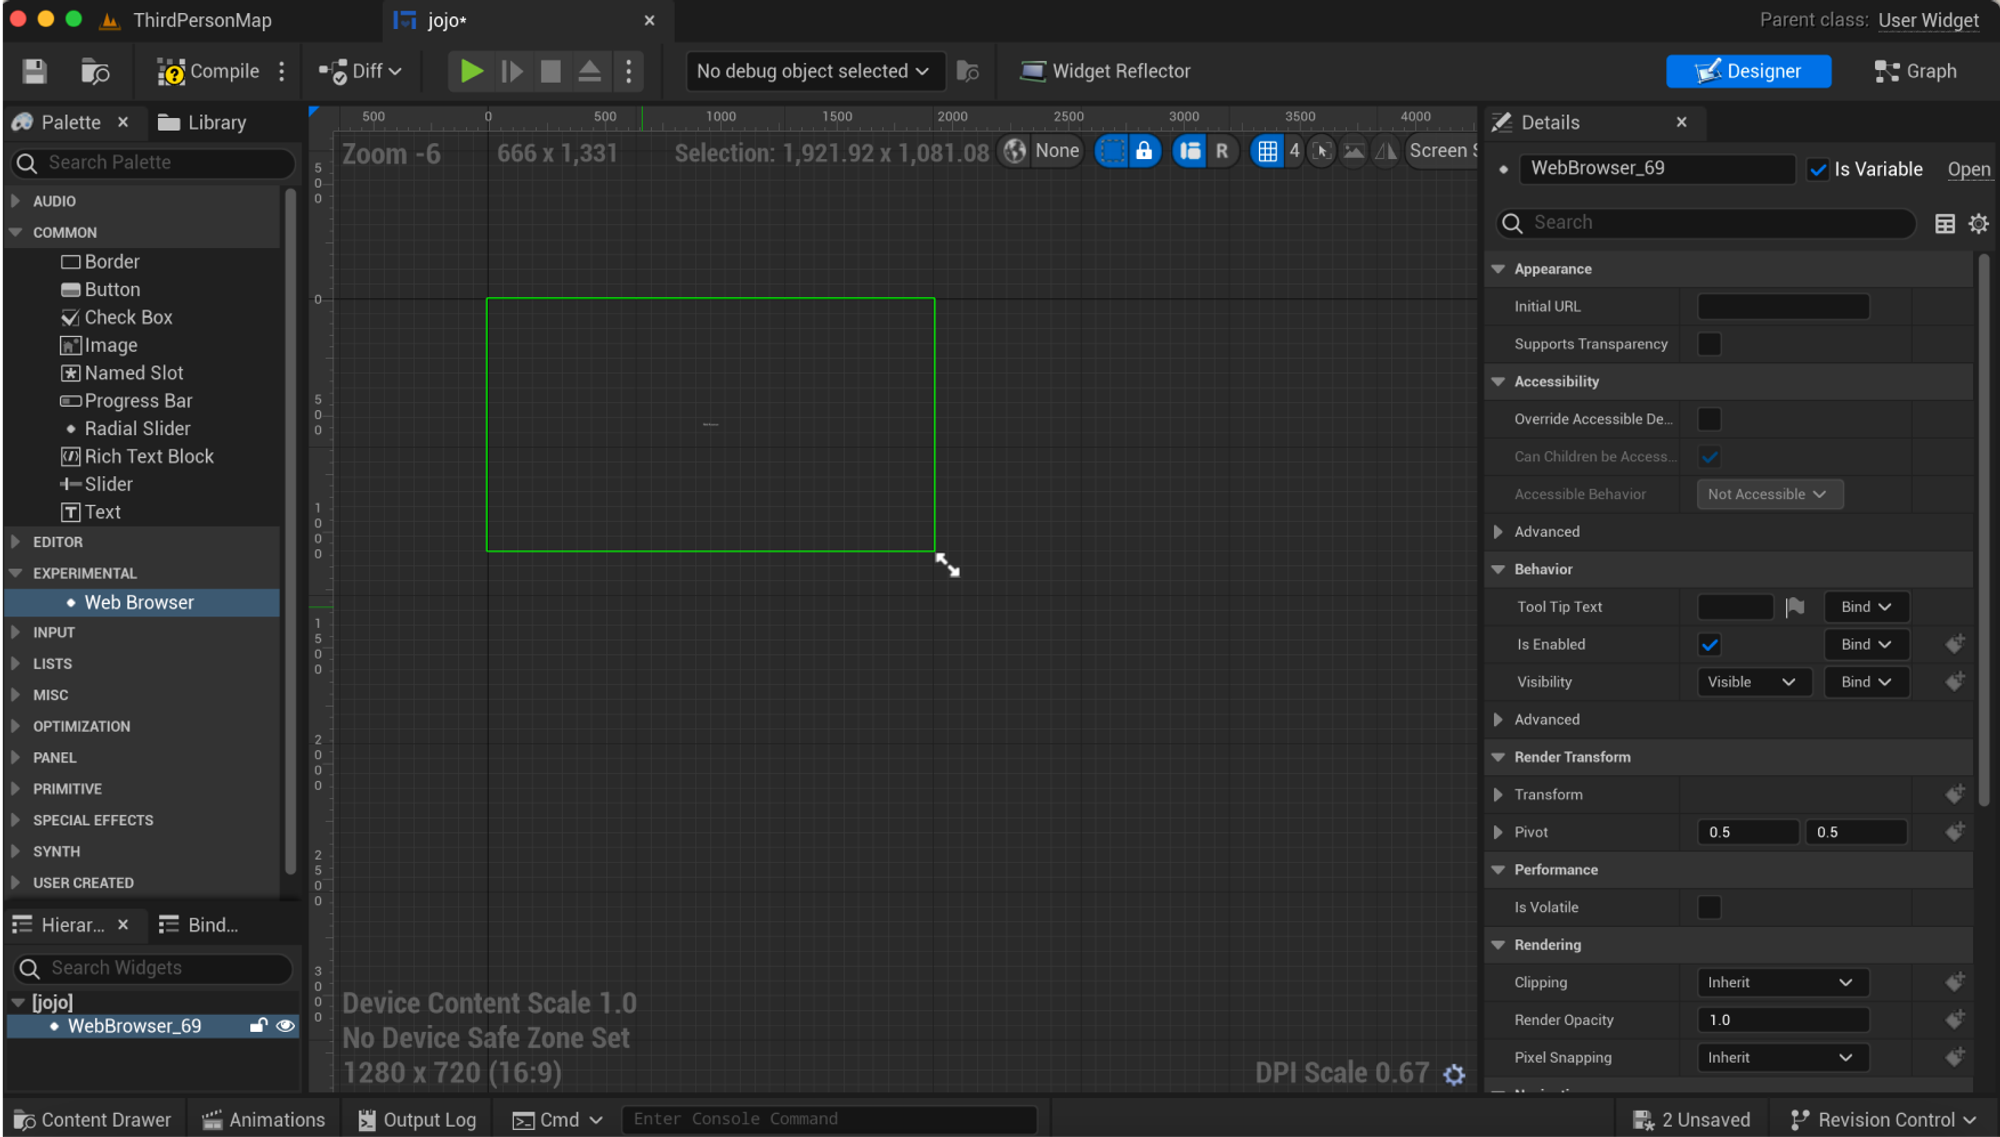
5. Resize (drag the double arrows) and position the Web Browser widget to fit your design.
Step 4. Configure the Web Browser widget
You will set up the web browser widget by copying and pasting the URL of the ProtoPie prototype into it.
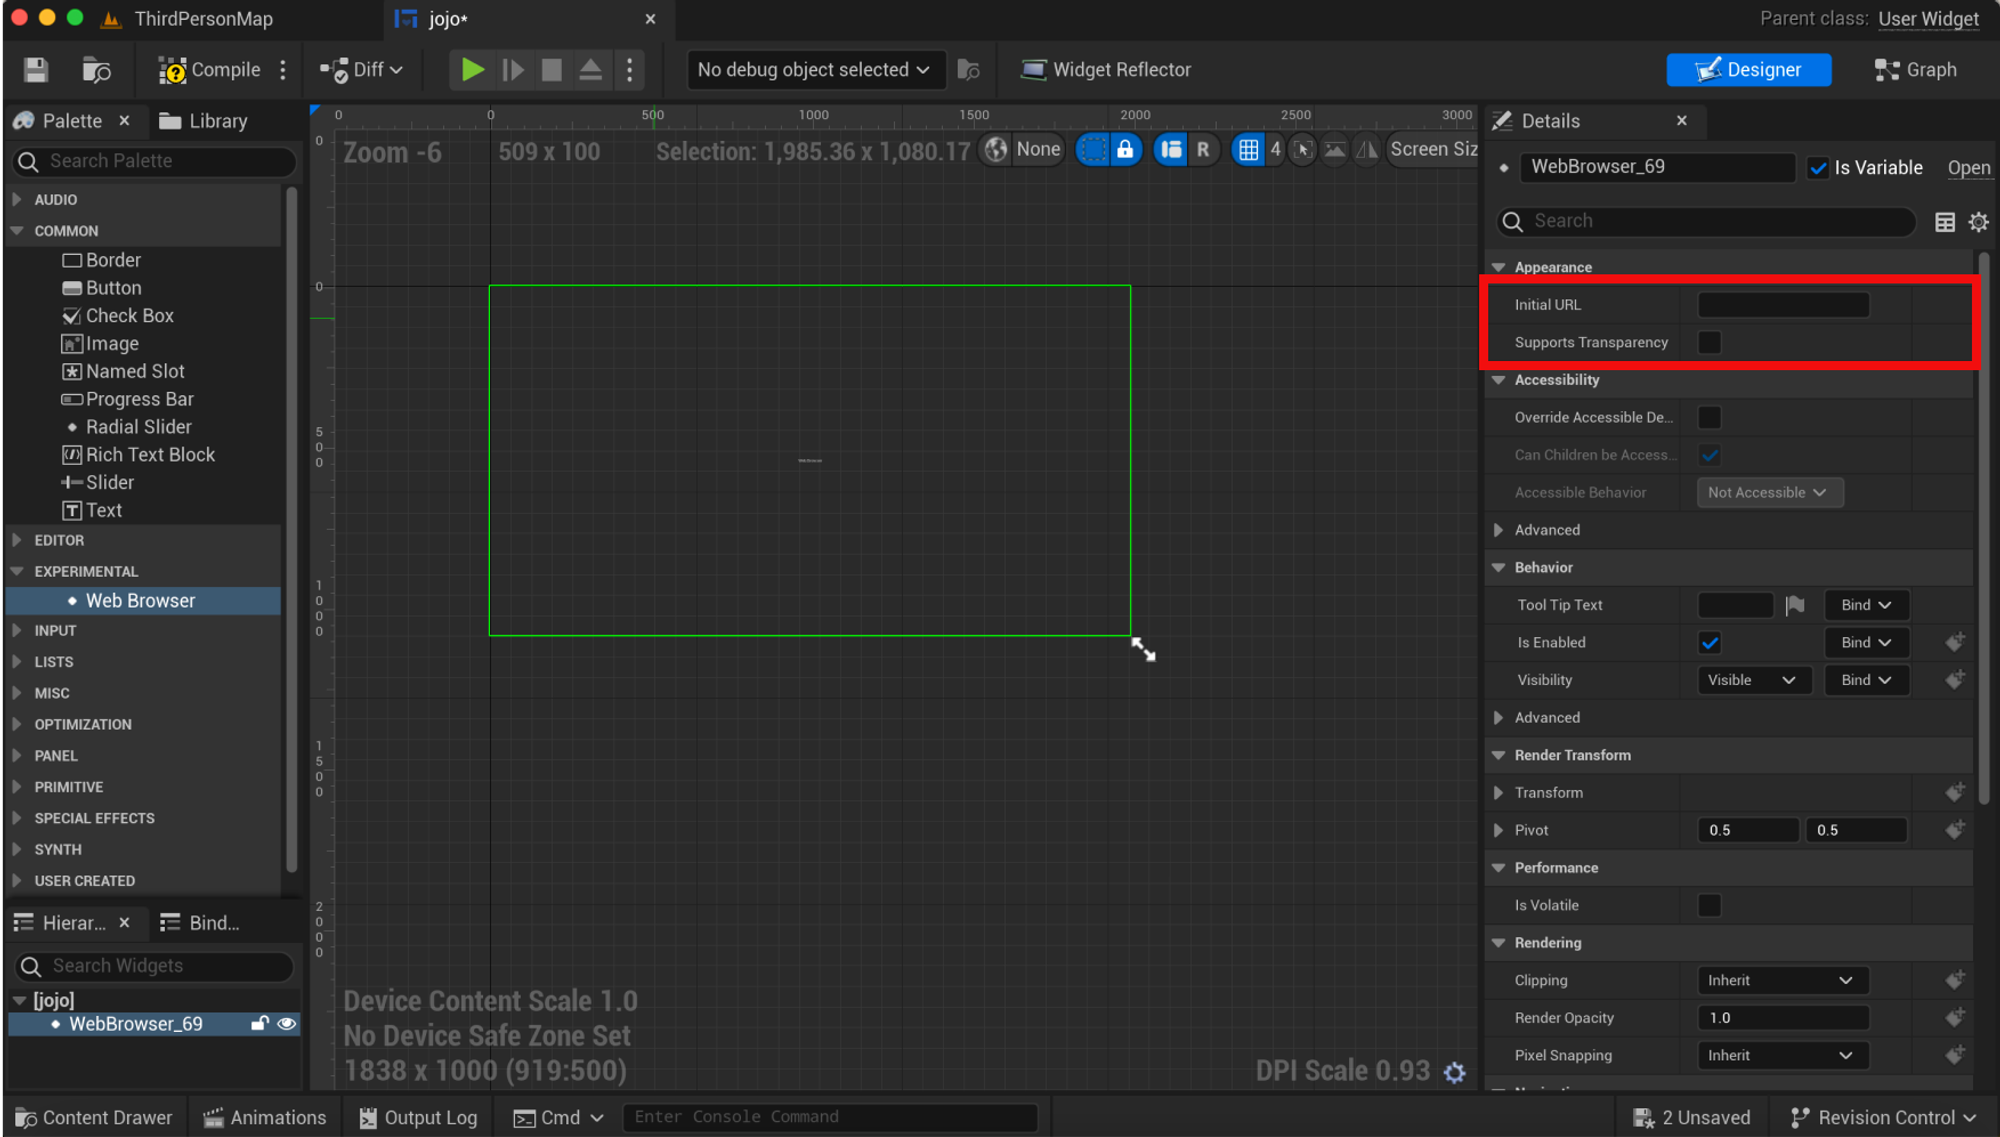
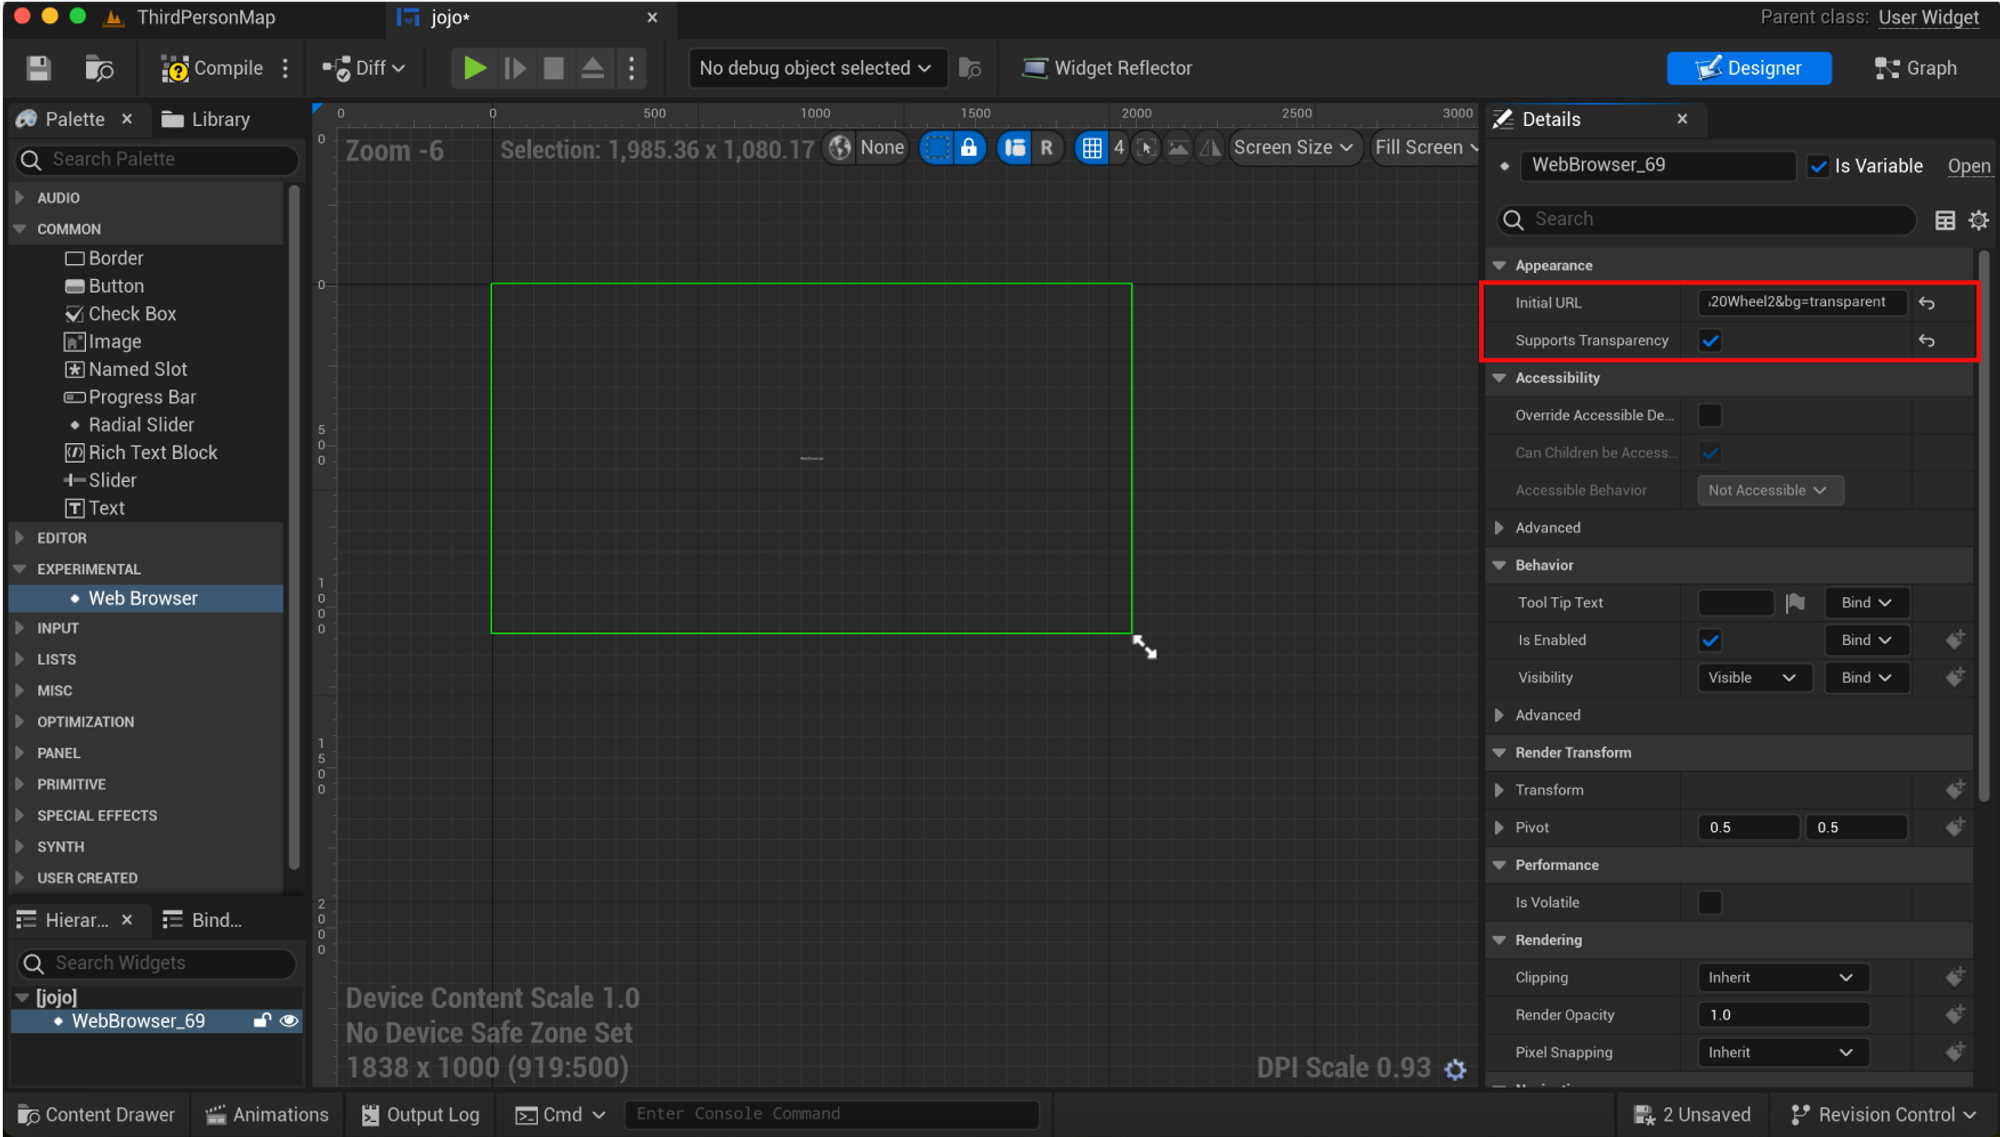
1. With the Web Browser widget selected, go to the Details panel.
2. Find the "Initial URL" property. Here, you will enter the URL where your ProtoPie prototype is hosted.
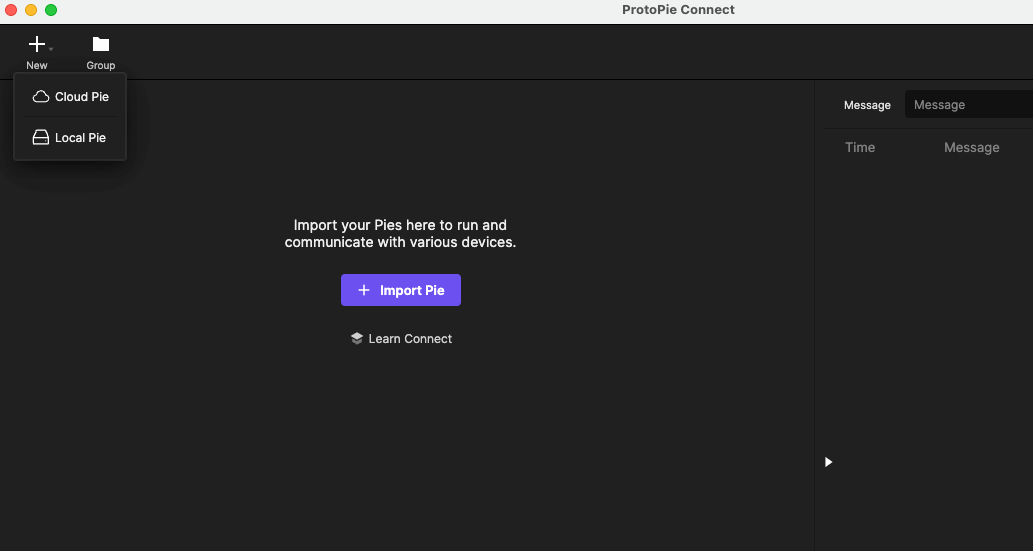
3. Launch ProtoPie Connect and import your prototype, selecting either from the Cloud (Enterprise only) or uploading a local Pie file. Check your network settings and permissions to avoid connectivity issues when loading prototypes from the Cloud.
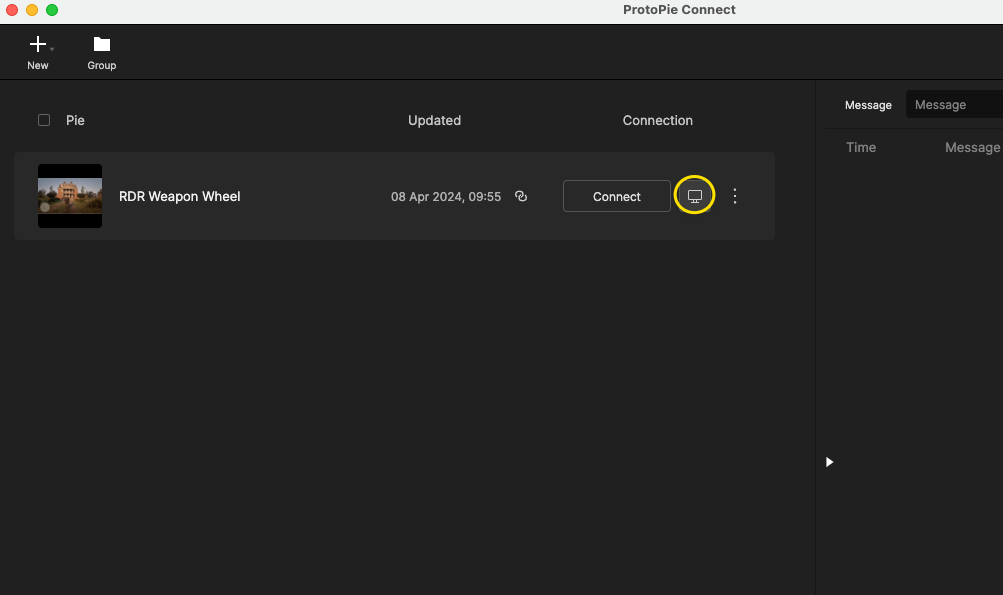
4. Click the web browser icon to open the Pie in a browser.
5. If your Pie has a transparent background, add “&bg=transparent” at the end of the URL.

6. Copy the entire URL from the address bar, return to Unreal, and insert it into the "Initial URL" field. Ensure to enable the "Supports Transparency" option.
Step 5. Create a Blueprint to display the widget
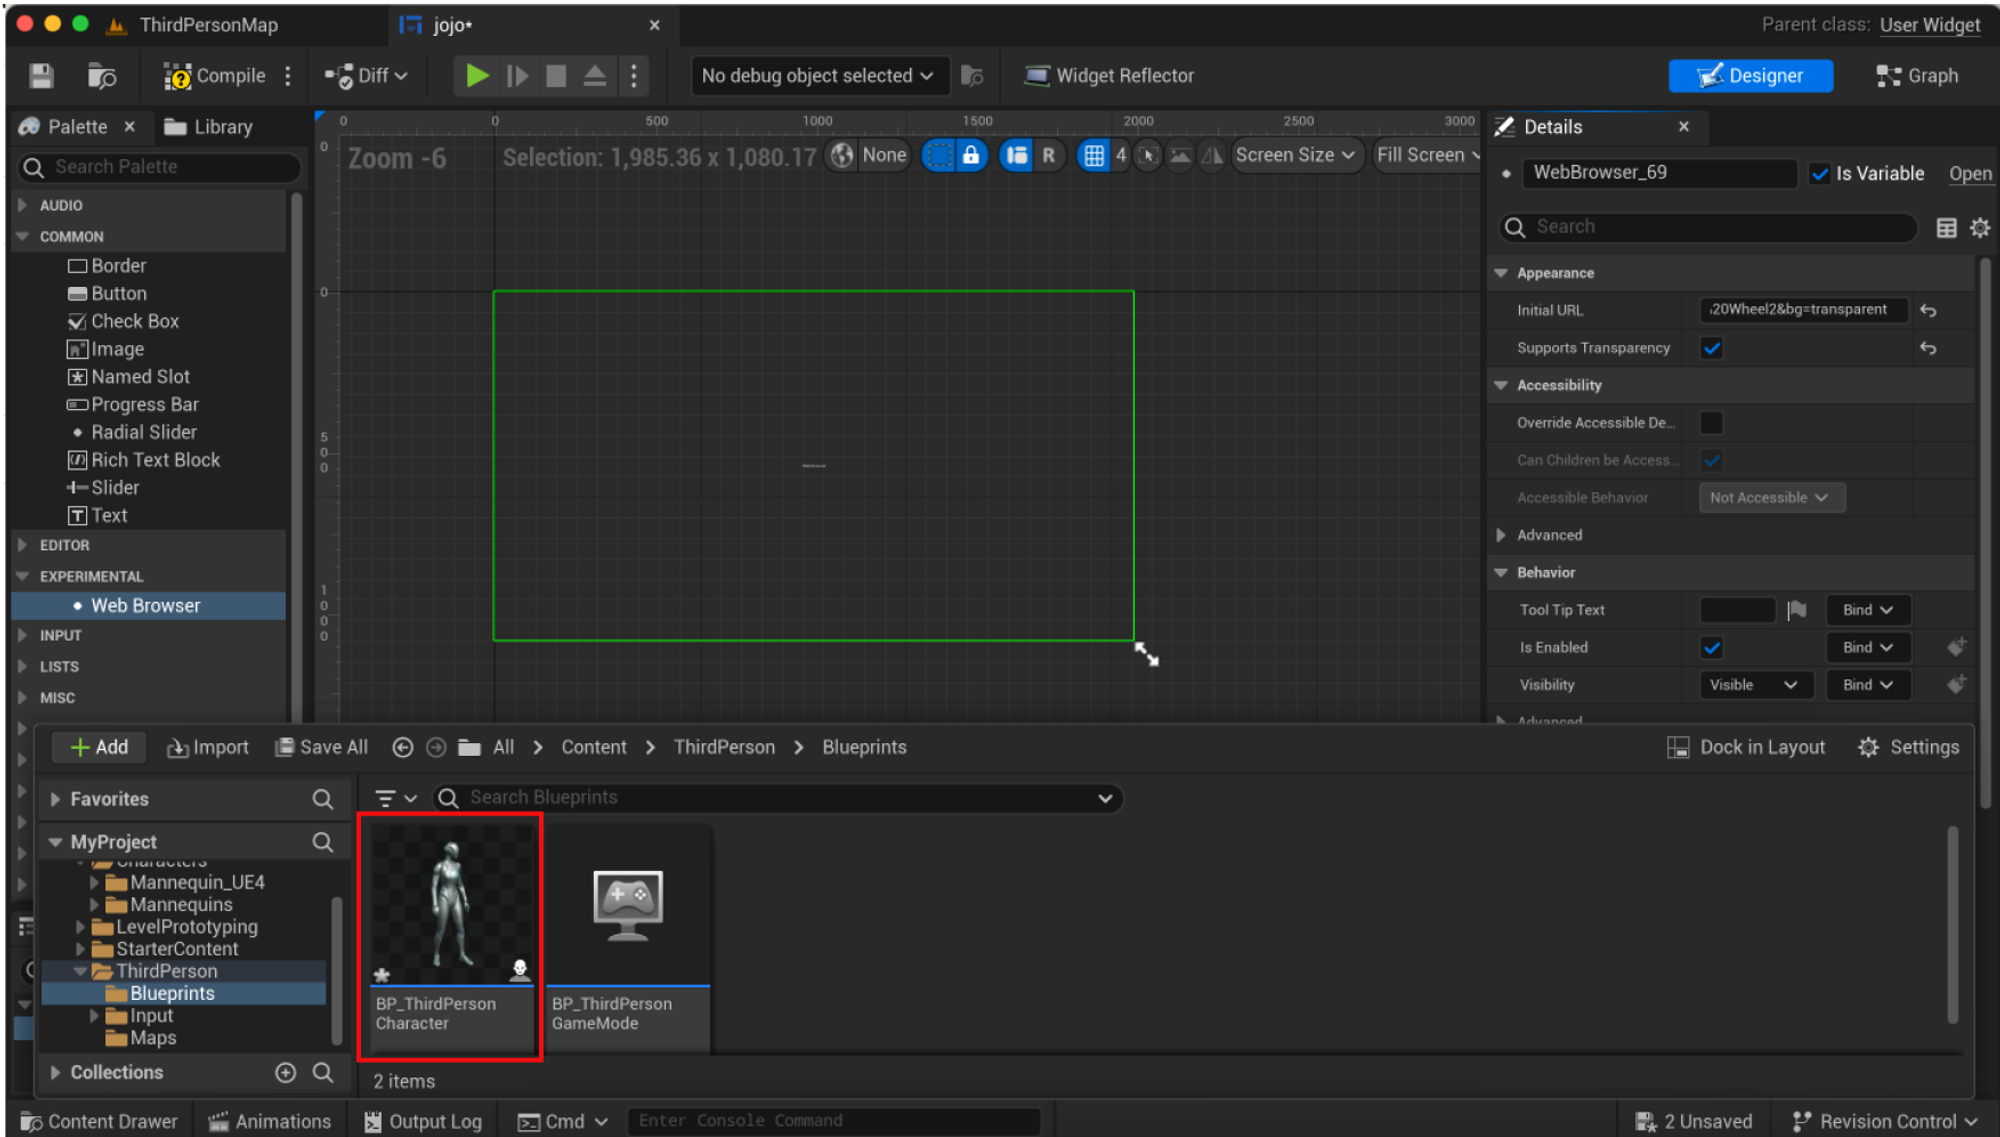
1. Go to the "Blueprints" folder in the Content Browser.
2. Right-click "Blueprint Class," then choose a class appropriate for displaying UI, such as an Actor or a PlayerController.
3. Name your Blueprint, and open it.

4. Since this guide uses the “Third person” Unreal template, select the “BP_ThirdPersonCharacter.”
Step 6. Add the UI widget to the Blueprint
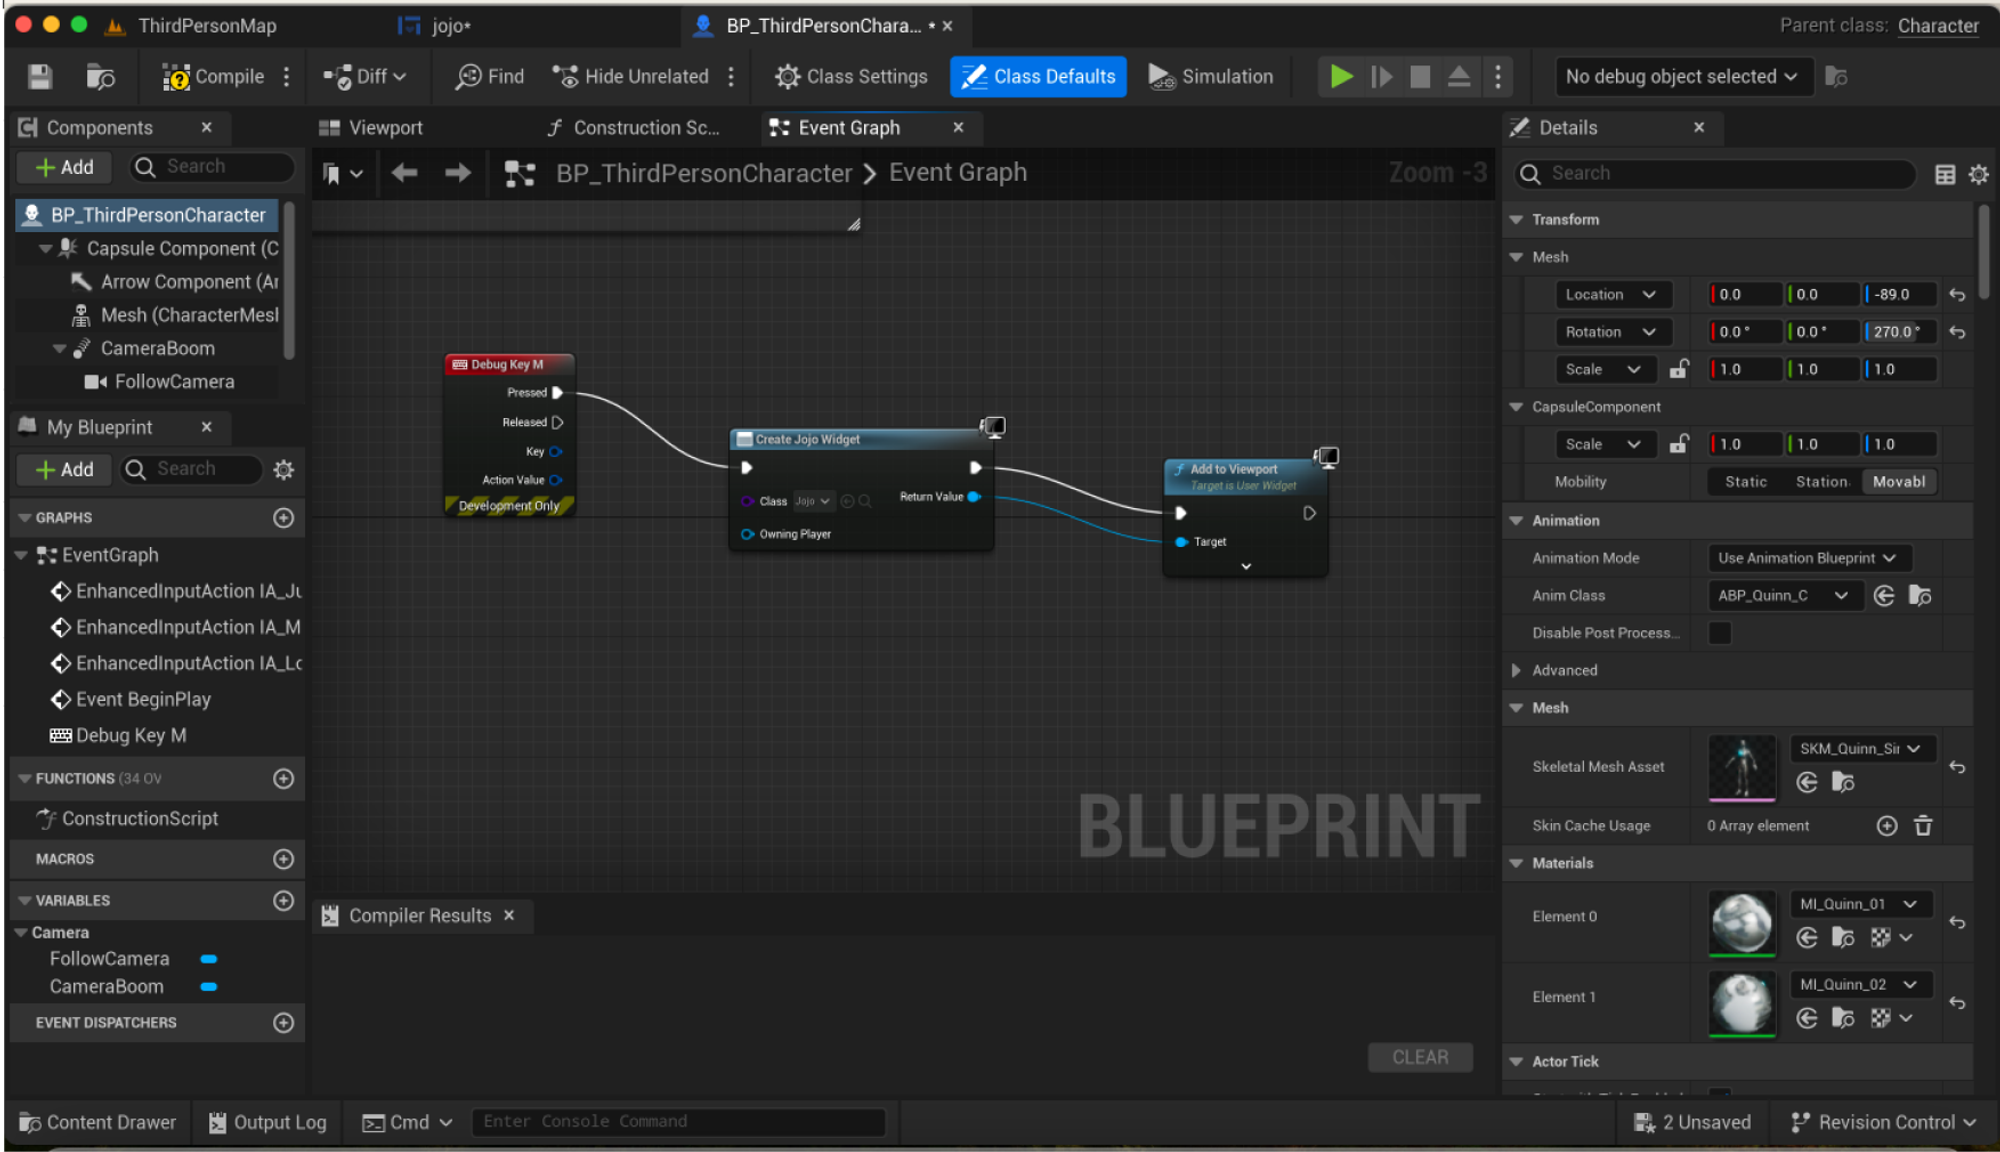
1. In the Blueprint editor, go to "Event Graph."
2. Create a new node for "Create Widget" and select your Web Browser widget as the class.
3. Connect the "Create Widget" node to the appropriate event (e.g., "Event BeginPlay" for an Actor or “key/gamepad Press”).

4. Add an "Add to Viewport" node and connect it to the "Create Widget" node to display the widget when the event triggers.
5. Press the “M” key on the keyboard to create the widget.
Step 7. Test your ProtoPie prototype in Unreal Engine
For the final test, you will test your ProtoPie prototype in Unreal.
1. Compile and save your Blueprint.
2. If your Blueprint actor is not already part of another Blueprint, like PlayerController, you can drag and drop it into the level.
3. Press "Play" to run the game in the editor and test the integration. Your ProtoPie prototype should display within the game environment using the Web Browser widget.
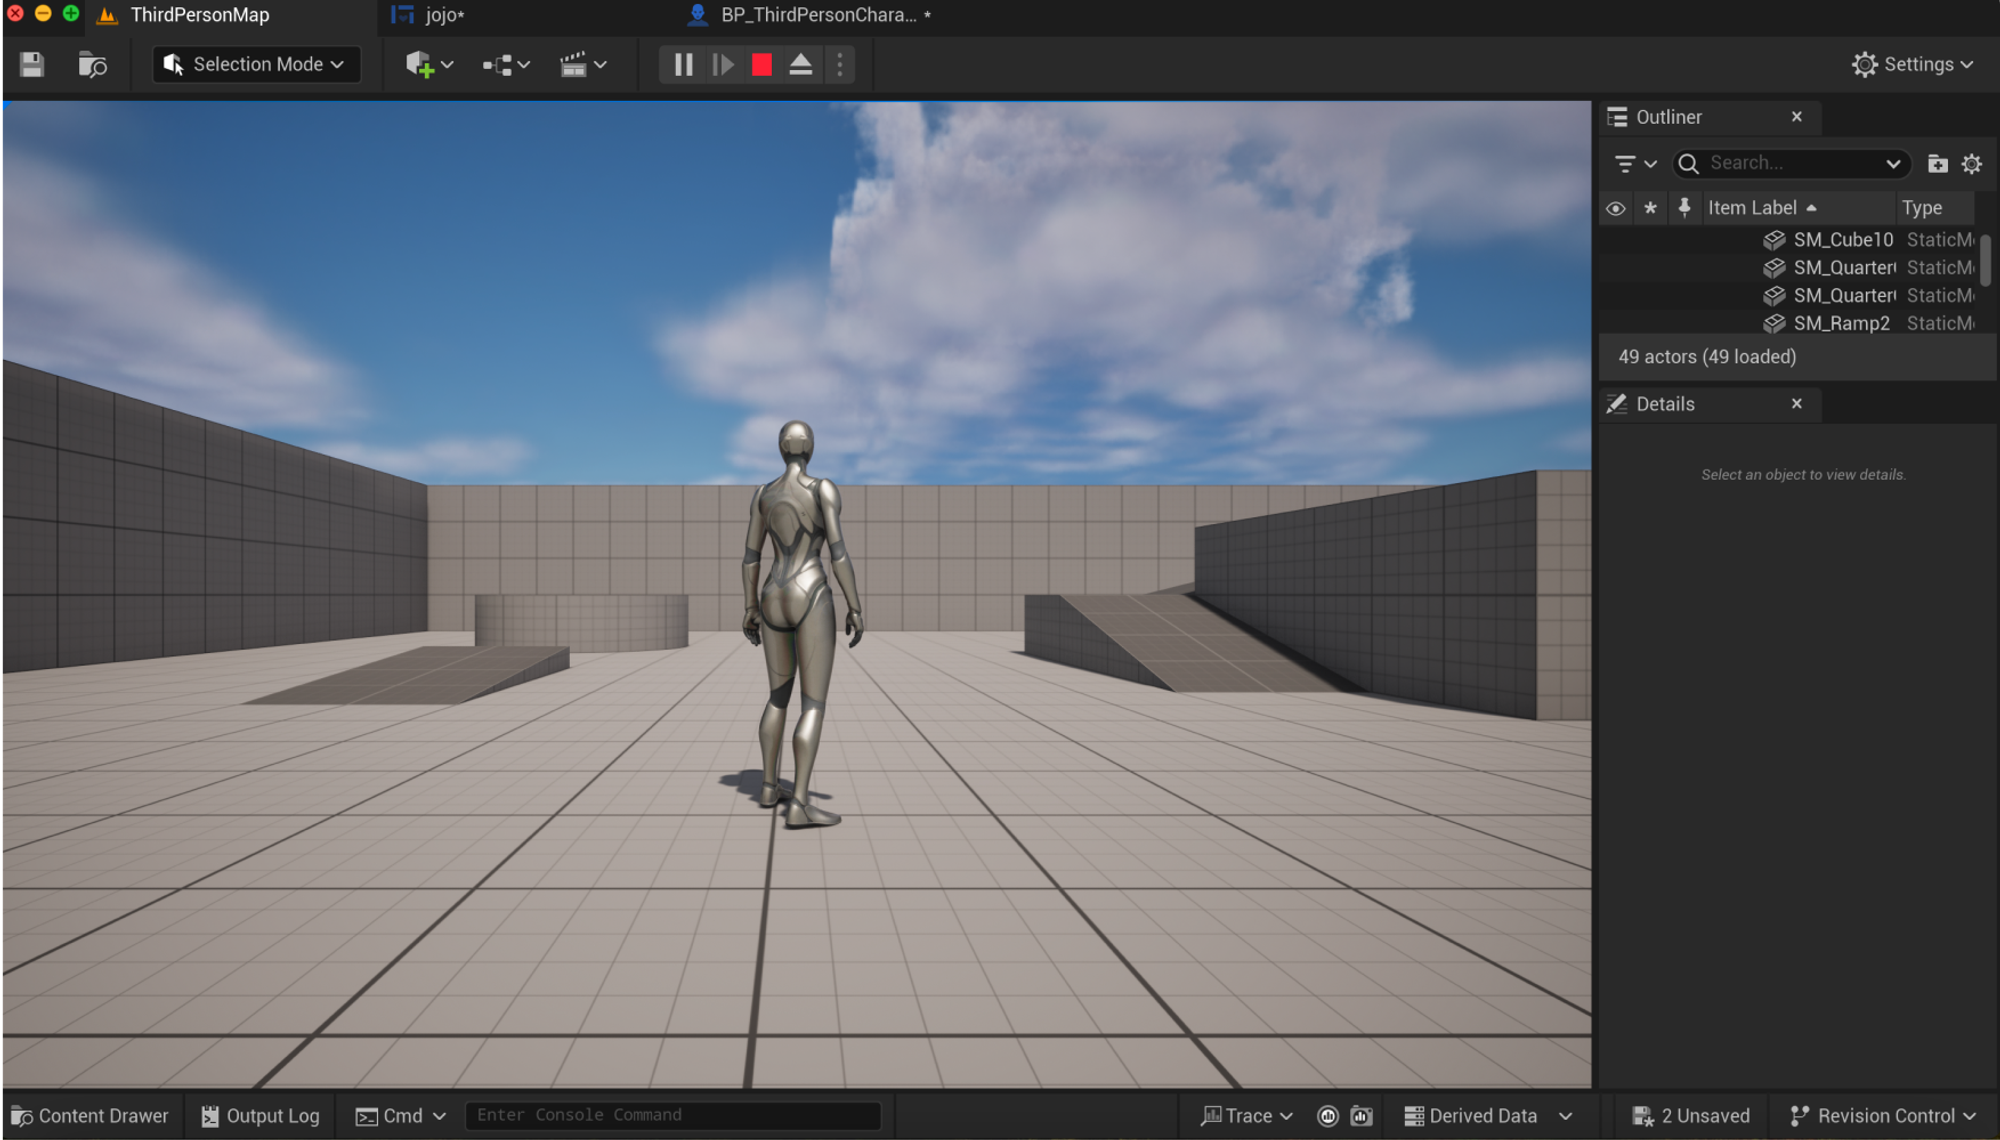
4. Press the key “M” on your keyboard to view your Pie.
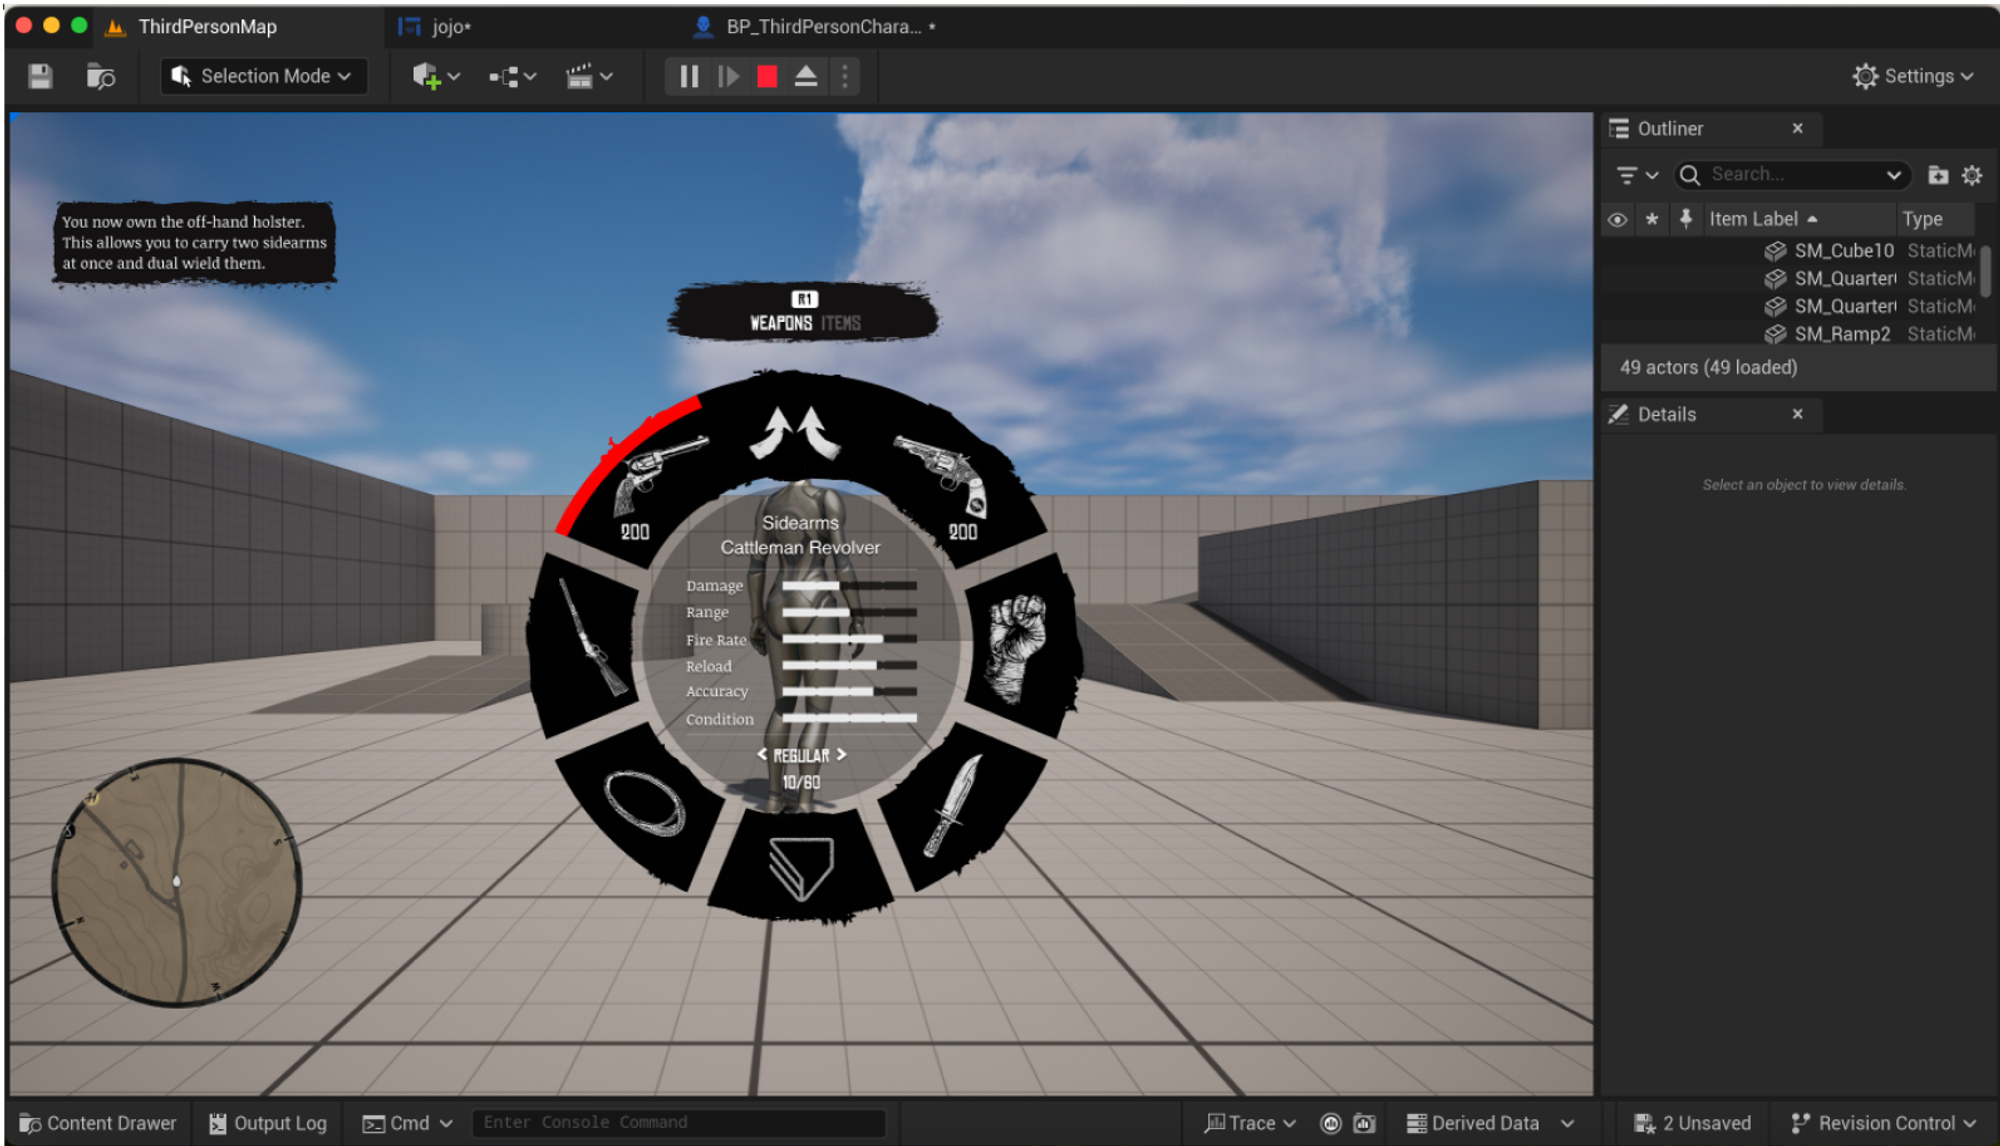
Unlock a world of possibilities with ProtoPie
The combination of ProtoPie Connect and Unreal Engine provides numerous possibilities for creators who want to push the boundaries of digital interaction. Whether you are designing for games, simulations, or any interactive media, this tutorial serves as a solid foundation for your creative projects.
Now that you have learned how to connect ProtoPie and Unreal Engine, why wait?
Start your journey with ProtoPie for free today and unlock the full potential of your creative visions. Your next groundbreaking project begins now—happy prototyping!
.jpg)
