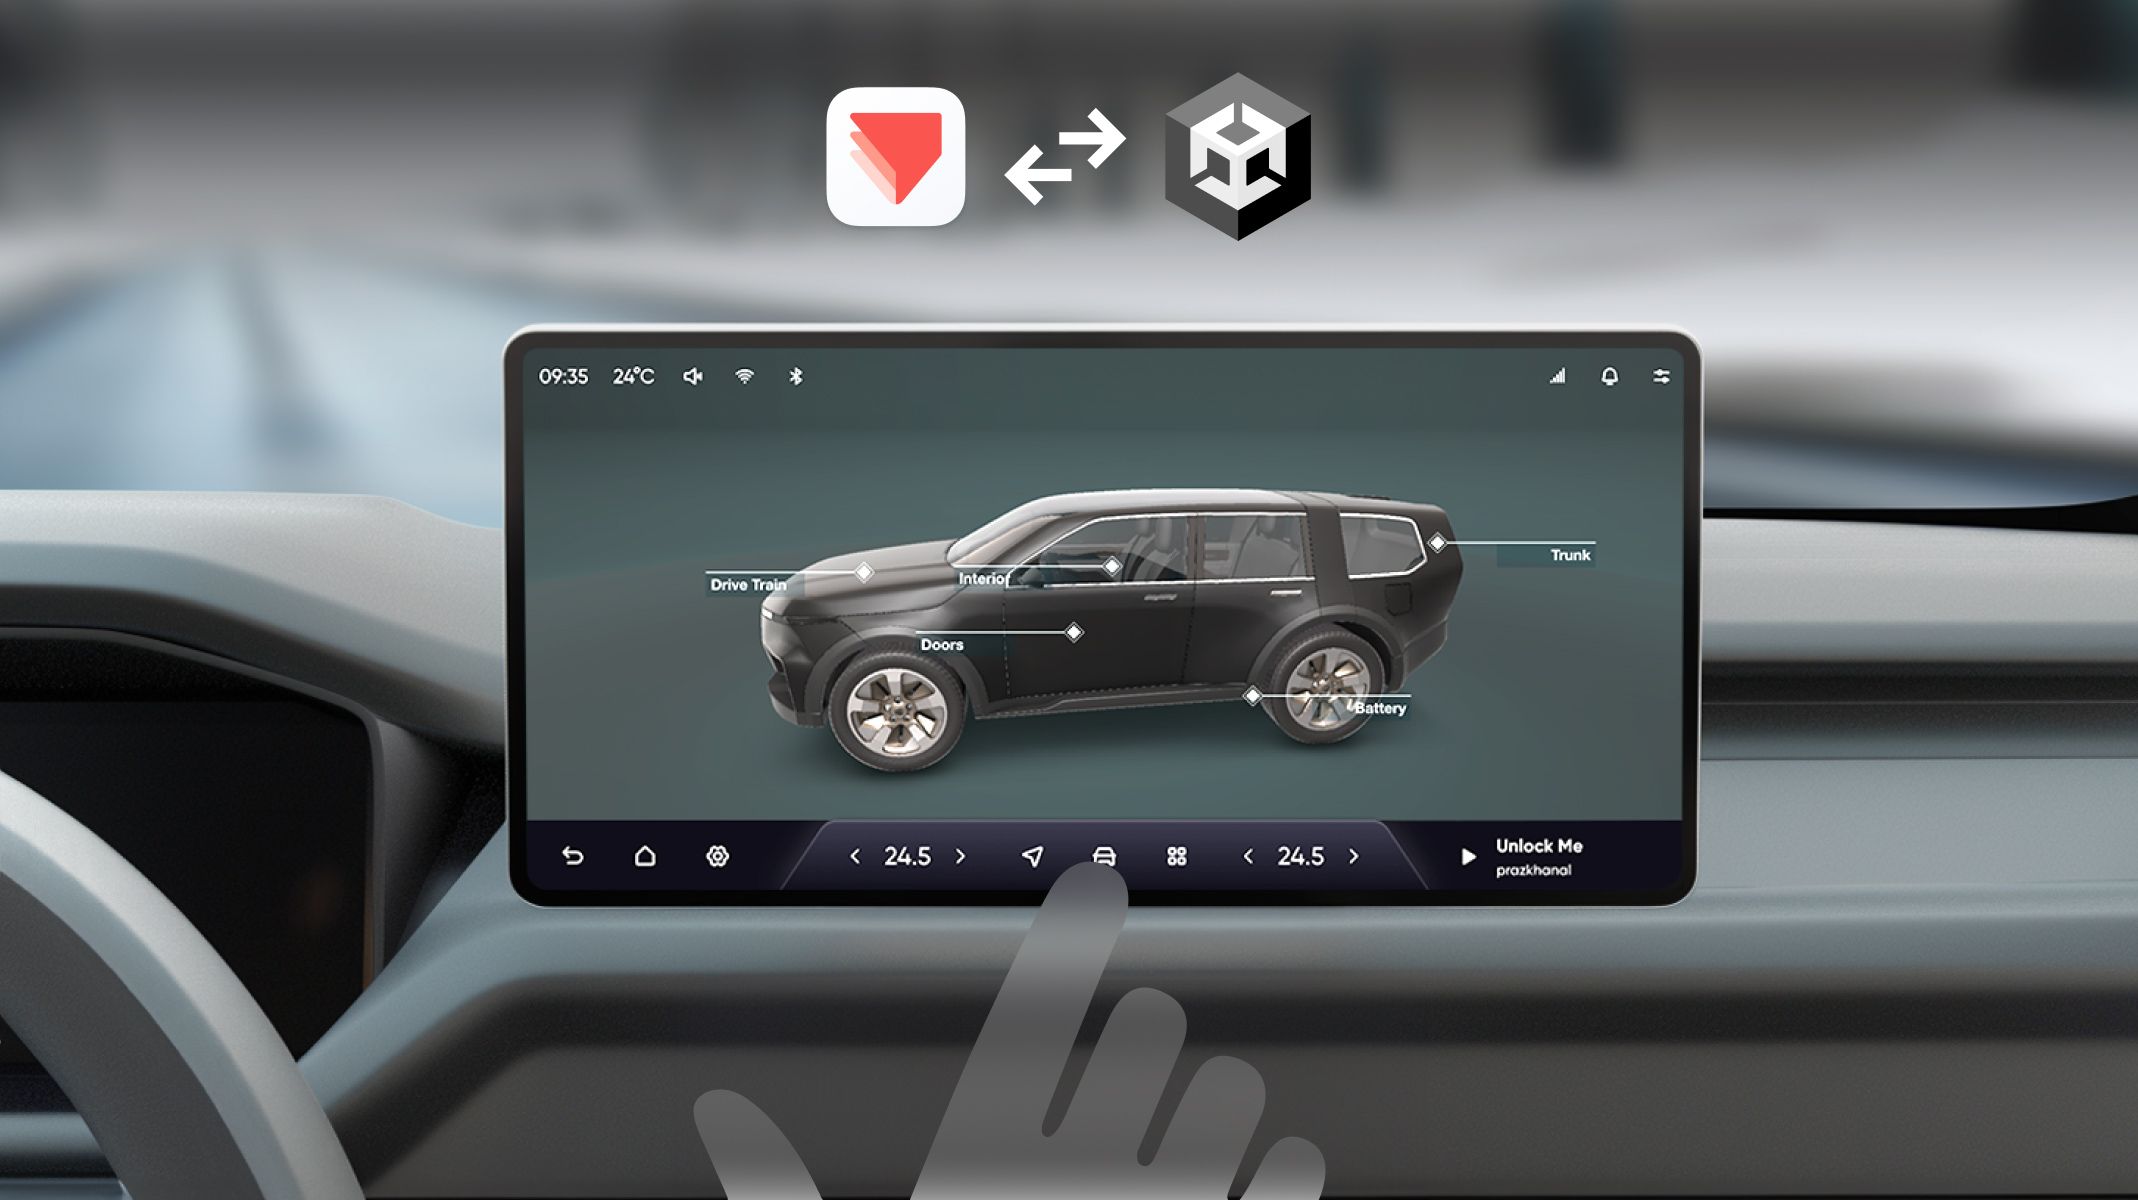
3D Car HMI Tutorial with ProtoPie Connect Unity Plugin
Follow this tutorial to create a 3D car HMI experience using the ProtoPie Connect Unity plugin.

.jpg?fm=webp)
Overview
- What is the Unity plugin?
- How to use Unity projects in ProtoPie Connect
- Step 1. Set up the Unity project
- Step 2. Configure the ProtoPie prototype
- Step 3. Configure message mapping
- Step 4. Build the Unity project
- Step 5. Test the interaction in ProtoPie Connect
- Workflow for integrating Unity with ProtoPie
- Tips for an effective Unity-ProtoPie integration
This step-by-step tutorial will guide you through creating a 3D car HMI experience using the ProtoPie Connect Unity plugin. Follow along to learn about the Unity plugin, how it works, and how to import and test Unity projects with ProtoPie Connect.
To get started, watch the video beginning at 10:12.
What is the Unity plugin?
First, let’s cover some basics: the Unity plugin and how to use it in ProtoPie Connect.
The ProtoPie Connect Unity plugin is a no-code solution that allows ProtoPie to interact with Unity layers. This plugin enables deep integration of ProtoPie with Unity, providing endless possibilities for creating complex and interactive prototypes. It is particularly useful for industries such as automotive, game, VR, and MedTech, but it can also be applied to many other fields.

How to use Unity projects in ProtoPie Connect
Before we start the tutorial, let's also understand what custom layers are and how we can use them to bring Unity projects to ProtoPie Connect.
ProtoPie Connect's Stage View enables you to integrate ProtoPie prototypes with various custom layers, including web content, embedded elements, live cameras, and Unity projects. This integration enhances the user testing experience and makes your designs more dynamic.
Now, let’s dive into our tutorial.
Step 1. Set up the Unity project
1.1 Download the automotive HMI template
We are using a modified automotive HMI template from the Unity Asset Store for this tutorial. This version includes only the specific 3D car elements needed for the demo. You can download the original file from this link.

1.2 Prepare the Unity scene
- Launch Unity and load the downloaded automotive HMI template.
- Save this modified scene, as it will serve as the foundation for our project.
1.3 Download and import the ProtoPie Unity plugin
- Download the ProtoPie Unity Plugin.
- Double-click the downloaded package to import it into your Unity project.
💡 Important: Verify that the "ProtoPie" game object is present in your Unity scene. This object is crucial for handling all message mappings and interactions.

Step 2. Configure the ProtoPie prototype
Now that we have installed the Unity plugin let's configure the ProtoPie prototype.
2.1 Download the Pie
This tutorial uses a basic ProtoPie prototype with various buttons (Drivetrain, Interior, Doors, Battery, Trunk, and Main View buttons). You can download the Pie here: Stage - Unity Vehicle 3D Main.
2.2 Set up Send & Receive functions
Assign Send responses and Receive triggers to each button in your ProtoPie prototype. This setup ensures that when a button is clicked, it sends a specific message to ProtoPie Connect, which then maps these messages to corresponding actions in Unity.
- For example, clicking the "Engine" button sends a
GoToEngineViewmessage. - Similarly, clicking the "Interior" button sends a
GoToInteriorViewmessage.
Repeat this configuration for all buttons. Once your prototype is fully configured, proceed to the next step.

Step 3. Configure message mapping
3.1 Create a new game object
In Unity, create a new game object and name it "ProtoPie.” This name is case-sensitive and crucial for the setup. This game object manages all the message mappings for you, eliminating the need to configure each Unity game object individually.

3.2 Add the message interaction script
- Select the "ProtoPie" game object.
- Click on "Add Component" and search for "Message Interaction".
- Add the "Message Interaction" script to the "ProtoPie" game object.
Now that the plugin is enabled, we’re ready to start mapping.

3.3 Define the mapping table
- In the Unity plugin, create a mapping table to define how ProtoPie messages will be mapped to Unity actions. For example, messages like
GoToEngineViewandGoToInteriorViewwill be included in this table. - Once the mapping table is defined, import it into the “Message Data” field in Unity. This step prepares the system for adding and executing the mappings.
Let’s look at an example of how to map the Main view.
- Choose the "Main" label from the mapping table, which already has a defined "Go to Main View" message.
- Specify that the message direction is from ProtoPie. This means that when ProtoPie sends a
GoToMainViewmessage, Unity will perform the corresponding action. - Add the specific action that Unity will execute when it receives the
GoToMainViewmessage. This is how the plugin maps ProtoPie messages to Unity actions.
Repeat this process for other buttons and messages, such as GoToEngineView and GoToInteriorView, mapping each message to its respective method in Unity. Once all mappings are complete, you can proceed to build your Unity project and integrate it with ProtoPie Connect for testing and refinement.

Understanding the mapping process
In this tutorial, an interaction object within the Unity scene contains predefined game logic and several scripts, such as the CurrentDirectionController script and the IVInputController script. These scripts are typically created by Unity specialists or engineers to handle game mechanics.
We will use these methods to map the ProtoPie messages. For example, the CarInteractionController script has several methods of controlling car animations, such as switching to the battery or interior view.
💡 Tip: Currently, the ProtoPie mapping table can only find the Invoke code from parent objects, not child objects.
Step 4. Build the Unity project
Now that all mappings are complete, let’s build the Unity project.
- In Unity, go to
File>Build Settings. - Choose
WebGLas the build platform and clickSwitch Platformif it's not already selected. - Ensure all necessary configurations for WebGL are set. This includes adjusting Player settings and any other specific build settings required for your project.
- Add the scenes you want to include in the build by clicking
Add Open Scenes. - Click
Buildand select a directory to save the build files. Unity will compile the project and create a folder containing all the necessary files for the WebGL build. - Once the build process is complete, locate and zip the build folder. This compressed file will be used to import the Unity project into ProtoPie Connect.

By following these steps, you will generate a WebGL build of your Unity project, which can then be embedded into ProtoPie Connect for interaction and testing.
💡 Tip: Before building, please make sure you have set the Compression Format as Disabled in the Player Settings.

Step 5. Test the interaction in ProtoPie Connect
1. Download the 3 Pies below.
2. Launch ProtoPie Connect and open all 3 Pies in Stage View.
3. Insert a new Unity layer into the Stage View. This will be the layer where your Unity build will be embedded.
4. Reorder the layers as needed and configure the Unity layer to ensure proper interaction.
5. Import the WebGL build from Unity into the newly added layer in ProtoPie Connect.

6. Switch to full-screen mode for a better testing experience.
7. Click on the various buttons in ProtoPie and observe their interactions. Each button should trigger a corresponding message to Unity.
- For example, clicking the "Drivetrain" button should switch the Unity view to the drivetrain view.
- Clicking the "Main View" button should revert the view back to the main interface.
- Test other buttons, such as "Interior," "Doors," "Battery," and "Trunk," to ensure they correctly switch views in Unity.
8. In ProtoPie Connect, monitor the messages being sent and received. Ensure that each ProtoPie message corresponds to the appropriate Unity method.

💡 Tip: If the animation works well in Unity but doesn’t work in ProtoPie Connect, please go back to Unity, find a script called Message interaction, and then change the code WebGLInput.captureAllKeyboardInput = false to WebGLInput.captureAllKeyboardInput = true.

Workflow for integrating Unity with ProtoPie
Below is our recommended workflow for integrating Unity with ProtoPie:
- Clearly outline the messages to be sent from ProtoPie and map them to corresponding events in Unity.
- Set up the defined messages within ProtoPie and map them to specific actions in Unity.
- Export your Unity project in a WebGL format suitable for embedding in ProtoPie Connect.
- Continuously test the integration and refine your design to ensure smooth interactions.

Tips for an effective Unity-ProtoPie integration
- Ensure clear communication and set expectations between ProtoPie designers and Unity specialists (engineers or developers). Each will have their own workflows and projects, so early discussions on interaction fulfillment are crucial.
- Be mindful of specific configurations, such as disabling compression in WebGL settings and ensuring the Unity object is named "ProtoPie" (case-sensitive). These details are essential for smooth integration.

Build and test interactive prototypes with Unity and ProtoPie
By following these steps, you can create a sophisticated 3D car demo using the ProtoPie Connect Unity Plugin. This integration allows for dynamic and interactive prototypes, enhancing your design and development process for applications in various fields, including automotive interfaces, game, VR, and medical technology.

.jpg?fm=webp)
.jpg?fm=webp)